Thursday, October 25, 2012

Lovely Frankenstein's 31 Days of Halloween: Fanged Pumpkins


 vampire-pumpkin-1011mld106876.jpg

OKAY MARTHA, enough already!!!  I want to resist your Molly Homemaker ways, but you make it so difficult for me to when you put out projects like this! If you know me, then you know I have a ridiculous weak spot for cartoony faces with big toothy smiles.  It never fails to make me giggle, and these are no different. Do you see their faces?! Gah! Okay, I'm done freaking out. 

If your kids or grandkids also have those little glow-in-the-dark vampire teeth that fit no one's mouth, this is a great way to inappropriate them before they get shoved into their mouths or lost until they get stepped on. But seriously. I am going to make ten of these when I go get my pumpkins from a GREAT local organization, Another Pumpkin Patch. To plug a really worthy local biz, all the pumpkins they grow are edible (not all pumpkin species are edible) and those that are not bought by customers after the season, are donated to the Marion-Polk Food Share.

So...thanks to the folks at Martha Stewart's website for making this available! CLICK HERE to see how to make these adorable little critters.

Wednesday, October 24, 2012

Lovely Frankenstein's 31 Days of Halloween: Cross-Stitched Pumpkin

 
How awesome is this?!  Meg Freeman over at Elsie Marley has figured out how to take an inexpensive, fake pumpkin (like those found at Michael's or JoAnn's) and turn it into a unique piece of Halloween decor.  This tutorial shows you how to mark out and cross stitch a 3D pumpkin.  This principle could be extrapolated to any other fake fruit or veggie item you'd want to add a little cross stitched flair to.  But this time around, it's a pretty white pumpkin with a black cross stitched skull.

CLICK HERE to learn how! Thanks to Meg for sharing!


Tuesday, October 23, 2012

Lovely Frankenstein's 31 Days of Halloween: Stuffed Pumpkins


Mainimage

Danielle at Thompson Family Life has shared this cute pattern on her blog.  This is one of two stuffed pumpkin tutorials I've found.  This one is the more basic of the two and it's a really great way to use larger scale, fun prints. There's no large stem or leaves to obstruct the pattern, so there's just really cute and petite.

CLICK HERE for the tutorial.  Thanks Danielle!

Monday, October 22, 2012

Lovely Frankenstein's 31 Days of Halloween: Ghost Cozies


Heidi Kenney at My Paper Crane has posted a really cute tutorial on making the adorable ghost cozies you see to the left.  They are just the right size to fit over your kitchen jars or breakables that you don't want people to see or mess with.  Perfect for parties or your seasonal decor, they're a snap to make and totally cute. Of course you could always take this from a cozie to a softie for your kids or grandkids!

CLICK HERE for the tutorial.  Thanks to Heidi for sharing!

Sunday, October 21, 2012

Lovely Frankenstein's 31 Days of Halloween: Fabric Transfer Art


Karen at The Graphics Fairy brings us these fantastic and spooky fabric transfers to make really neat wall art using embroidery hoops.  These would make great pieces of Halloween art, but how cool would these look as creepy appliques on a Halloween wall hanging?  And yes, grandma, of course the bat is my favorite! :)

CLICK HERE for the free PDFs.  Thanks Karen for sharing!

Friday, October 19, 2012

Lovely Frankenstein's 31 Days of Halloween: Knitted Witch

Image for Knitted Halloween Witch DIY Craft Project
Here's another one from Craft Bits.  I don't knit well at all (don't even get me started on purling) but this little witch is a cutie! 

CLICK HERE for the pattern

Thursday, October 18, 2012

Lovely Frankenstein's 31 Days of Halloween: Crocheted Kid's Bat Beanie


Image for Crocheted Bat DIY Craft Project

I found this over at Craft Bits.  I don't know who to give credit to for designing the pattern, they only listed the person who submitted it. But this is way cute and I know that as a kid I would have flipped over this hat!  I am TERRIBLE at all things knitting and crochet, but I know some of you all rock at it and probably know some little kid would would love this!

CLICK HERE for the pattern.

Wednesday, October 17, 2012

Lovely Frankenstein's 31 Days of Halloween: Too Scary Mary Pillow


Jane at Quilt Jane made this awesome pillow, and one of the coolest aspects of it, is that she hand drew that skull in the middle.  What a talented lady! Luckily for those of us who can't draw a skull as realistically as she can, she has made the skull available.  It would be super simple to print this on some iron-on transfer paper and make it into whatever you want...but the pillow is pretty cool too.

CLICK HERE for the skull pattern. Thanks to Jane for sharing!

Tuesday, October 16, 2012

Lovely Frankenstein's 31 Days of Halloween: Boo Embroidery


Well isn't this adorable?  I love the fatty little bat!  This simple little embroidery designed by Amanda Woodward-Jennings would look fantastic on a set of seasonal dish towels, cloth napkins or even as a quilt label!  Hmm...I better bust out the DMC and give this a whirl, I have a bunch of plain dishtowels that need a little something.  

CLICK HERE to find the pattern.  Thanks for Amanda for sharing!

Monday, October 15, 2012

Lovely Frankenstein's 31 DAys of Halloween: Cheap and Easy Halloween Decor


 Wicked Witch Boots Decoration

This is a quickie little post.  Better Homes and Gardens has an article out right now about making cute and inexpensive Halloween decorations. There are bats, ghosts, pumpkins and more of the usual Halloween fare.  There's nothing particularly gorey or scary here.

CLICK HERE for the projects!

Sunday, October 14, 2012

Lovely Frankenstein's 31 Days of Halloween: Cross Body Trick or Treat Bag


The one thing about Halloween that makes me sad (hold on, you'll be able to pick your jaw up off the floor in a minute) is that trick or treating is a dying tradition.  Out of paranoia (which is only partially founded in fact, the rest in media hysteria)  parents no longer allow their kids to trick or treat in neighborhoods like when I was a kid (which was thee best part of Halloween), and instead take them to the mall during the day to trick or treat.  Ick! Where is the fun in that?  Just follow common sense safety rules and it's all good clean fun!

Fine I'll hop off the soap box. Back in the day my brother and I went beyond the little plastic pumpkin trick or treating buckets.  We straight up carried pillowcases....great for a huge haul of candy but it did get to be a pain to carry. This is a great trick or treating bag designed by Alicia Thommas and instruction provided by Debbie Guild that is carried cross body so the hands are free and it doesn't get cumbersome. I love the fabric they chose...I have several yards of that that needs to be used!

CLICK HERE for the tutorial. Thanks to Alicia and Debbie for sharing!

Saturday, October 13, 2012

Lovely Frankenstein's 31 Days of Halloween: Halloween Redwork


Anyone who knows me, knows I'm not a hand-stitching, hand-work kind of girl.  I try to think I am, but uh, I get bored halfway through and say, "Ehhhh forget it." This one from Pattern Bee is has got a vintage flair but it's still just a little creepy at the same time.  I'm not sure how  feel about the pumpkin man in the little kid's bedroom, but hey, I'm not going to assume anything here. It would be neat on a throw pillow or a dishtowel though for sure!

 CLICK HERE for the free pattern.

Friday, October 12, 2012

Lovely Frankenstein's 31 Days of Halloween: Halloween Creature Wall Hanging


 This wall hanging is cute on it's own, but I think it's better as a jumping off point to something more. I found it over at Celebrating Halloween and unfortunately, this is another where no designer name was given so I can't give credit to whoever made it.  But how fun would it be to extrapolate the designs here, and make a table runner, or maybe a throw?  The appliques are just too fun!

CLICK HERE for the free pattern!

Thursday, October 11, 2012

Lovely Frankenstein's 31 Days of Halloween: Pumpkin Placemats


pumpkin placemat pattern 


I have no idea who came up with this pattern, so unfortunately I can't give credit where credit is due.  However, it is really cute and it would be perfect for a kids Halloween party, since you can tuck the utensils and napkin right inside the pumpkin.  They opted here for bright colors, but I could see this being darling in a more primitive style colorway.

CLICK HERE for the free pattern!  

Wednesday, October 10, 2012

Lovely Frankenstein's 31 Days of Halloween: Pumpkin Projects


Nothing says Halloween like a pumpkin.  Be it a Jack-o-Lantern or just a regular ol' pumpkin, having a pumpkin around just says Halloween is coming.  Here are 8 projects from Amanda Formaro at Craft Gossip Home and Garden that put a spin on the usual pumpkin fare.

CLICK HERE to get to the projects!  Thanks for gathering these for us, Amanda!

Tuesday, October 9, 2012

Lovely Frankenstein's 31 Days of Halloween: Bone Chillers Soap


The ladies over at Crafting Rebellion have brought us a really nice tutorial on how to make these cute little skull soaps. Personally, I have never attempted making soap, you know, ever....but this makes it look pretty easy.

CLICK HERE for the tutorial.

Monday, October 8, 2012

Lovely Frankenstein's 31 Days of Halloween: Batty Felt Pillow


How cute! Amy at Ameroonie Designs has a tutorial up for this batty felt pillow.  The possibilities are pretty limitless!  You could use a fun print in the background, and then the black bats. Or, you could do a black background with multicolored halloween print bats.  You could change the bats to pumpkins, or ghosts, or whatever you want! I think this is pretty great, and hey....I need more pillows on the sofa (fine, I don't, but it sounds good).

CLICK HERE for the tutorial. Thanks Amy!

Sunday, October 7, 2012

Lovely Frankenstein's 31 Days of Halloween: Painted Burlap Table Runner


 Halloween-Burlap-Runner-15


This is SO COOL.  Here is a tutorial for a fantastic burlap table runner by Colleen over at Just Paint It.  Every once in a while, it's nice to have a no-sew project and something to stretch those ol' traditional art muscles. Plus, you can put whatever Halloween scene you want, from creepy to whimsical. I know mine would be stomping right through creepyville!

CLICK HERE for the tutorial.  Thank you Colleen for sharing!

Saturday, October 6, 2012

Lovely Frankenstein's 31 Days of Halloween: Ghoulies and Ghosties Quilt


 Ghoulies & Ghosties: FREE Halloween Lap Quilt Pattern

 Here is a really nice throw quilt by Kelly Corbridge over at McCall's Quilting. This is a more traditional style quilt, but of course, you could do it in any colorway you like.  The appliques lend themselves to really just about any colorway too, and really, you could replace them for any season.
CLICK HERE for the free pattern!

Friday, October 5, 2012

Lovely Frankenstein's 31 Days of Halloween: Itsy Bitsy Spiders Wall Hanging

 
I LOVE this wallhanging!  The ric rac is just too cute.  I always forget that ric rac is even a thing (yeah, yeah, I know) but every time I see it used I always think, "that's really cute, I need to use ric rac more often."  Do I ever?  Nope.  But the thought it nice I 'spose. 

This was done by Alisha Jane over at AJ's Bow-tique and her tutorial is really good.  It's one of those projects that goes by quickly, but just because it's a quickie project doesn't mean it can't turn out  this good! 

CLICK HERE for the tutorial, and thank you to Alisha Jane for sharing!

Thursday, October 4, 2012

Lovely Frankenstein's 31 Days of Halloween: Paper Pieced Pumpkin, Cat and Witch Blocks


These paper pieced blocks are awesome!  Even if paper piecing isn't your method of choice, you have to admit....these are cute!  I have to say, I do like the precision of paper piecing and the pumpkin is my favorite with his huge toothy grin.  These, and so many more, free paper piecing patterns are found at Artesania.  These three patterns where all designed by Sonja Callaghan. Thanks to Sonja for sharing with us!
CLICK HERE for the pumpkin pattern
CLICK HERE for the cat pattern
CLICK HERE for the witch pattern

Wednesday, October 3, 2012

Lovely Frankenstein's 31 Days of Halloween: By the Light of the Moon Quilt


I've never been a cat person (no, not even for Halloween) but I DID fall in love with the candy corn border. This quilt is brought to you by Elizabeth Cecchettini for Baby Lock. I like the quilt's retro flavor, and it's a manageable size, so that if you wanted it done and ready for the wall or table in time for Halloween, it's definitely doable!

CLICK HERE for the free pattern

Tuesday, October 2, 2012

Lovely Frankenstein's 31 Days of Halloween: Witch Shoe Treat Bags


Sharon at Dances With Fabric has put out a tutorial for a really cute witch shoe shaped treat bag.  Sure, you could use it for a treat bag, but as she also points out it would make a great silverware holder too.  I think it would look great hanging on the fireplace like a Halloween stocking! 

CLICK HERE for the free pattern.  Thanks for sharing this with us Sharon!

Monday, October 1, 2012

Lovely Frankenstein's 31 Days of Halloween: Ghoul's Night Out Table Runner


 http://www.eeschenck.com/i/qc_both/gallery/Ghouls%20Night%20Out/Ghouls_Night_Out_Table_Runner.jpg

This spooky table runner by Grace Wilson for Maywood Studios is fun and versatile.  How great would this look on your buffet for a Halloween potluck?  This is shown using Maywood fabrics (which look great) but you could take it into creepy territory or make it bright and whimsical.

If Halloween isn't quite your thing, this would convert beautifully to a fall or harvest themed table runner perfect for your Thanksgiving table.

CLICK HERE to get the free pattern

Friday, September 28, 2012

'Tis the Season to get Spooky!

Well, it's almost the end of September. 

And, lately, as with most of this year.....my total posts equal right around zero.  In my defense...most of the things I've been working on lately can't be put on here, because they're gifts and those people read this thing.  Talk about a spoiler alert!

But instead of going out with Isabelle tonight like planned, instead I'm at home with the sinus headache from hell.  My head feels about 5 feet wide and hey, who knew teeth could feel?  Mine do and they feel awful.  So I'm home in the bedroom hoping that after a double dose of my usual headache meds a few hours ago (that did just about nothing)  maybe some nice generic Benedryl Sinus will do the trick.  Just when everyone else's allergy season finishes, my allergy season begins.  Awesome! 

So being laid up with a painful noggin, I have no excuses left not to update the ol' bloggy blog. 

That being said...it's almost October, which means it's almost time for Lovely Frankenstein's 31 Days of Halloween.  'Tis the season to be spooky...and it starts Monday.

Friday, August 3, 2012

Friday, July 27, 2012

Finally a Reason to Learn to use the 45 Degree Line on my Ruler!

I've been at this quilting thing for 4ish years now, and all this time I've stared at my 6.5"x24.5" ruler at the 45º mark on it and wonder what on earth I'm supposed to do with it. I know I'm not the only one, I've heard time and time again about people getting intimidated or confused by how or why to use that line. Well, I found a reason to use it and you know? It wasn't difficult. Like, at all. Once you get the hang of the first cut or two, it's cake!

So I decided to do the Spirals Tabletopper by Designs to Share with You. It's looks way more complicated than it is, and it doesn't require a ton of fabric to make...so, perfect!

Here in Oregon, Summer has been an elusive beast this year. And even though it's just barely starting to feel summerish, the tree in my front yard is already donning it's fall colors. Yes, in July, and no, the tree isn't sick. And at the shop, fall fabrics are starting to arrive and people are gearing up for their fall projects, so I decided to (even though all of me wanted a bright, summery tabletopper) go for a more fallish theme. These are the fabrics I chose:

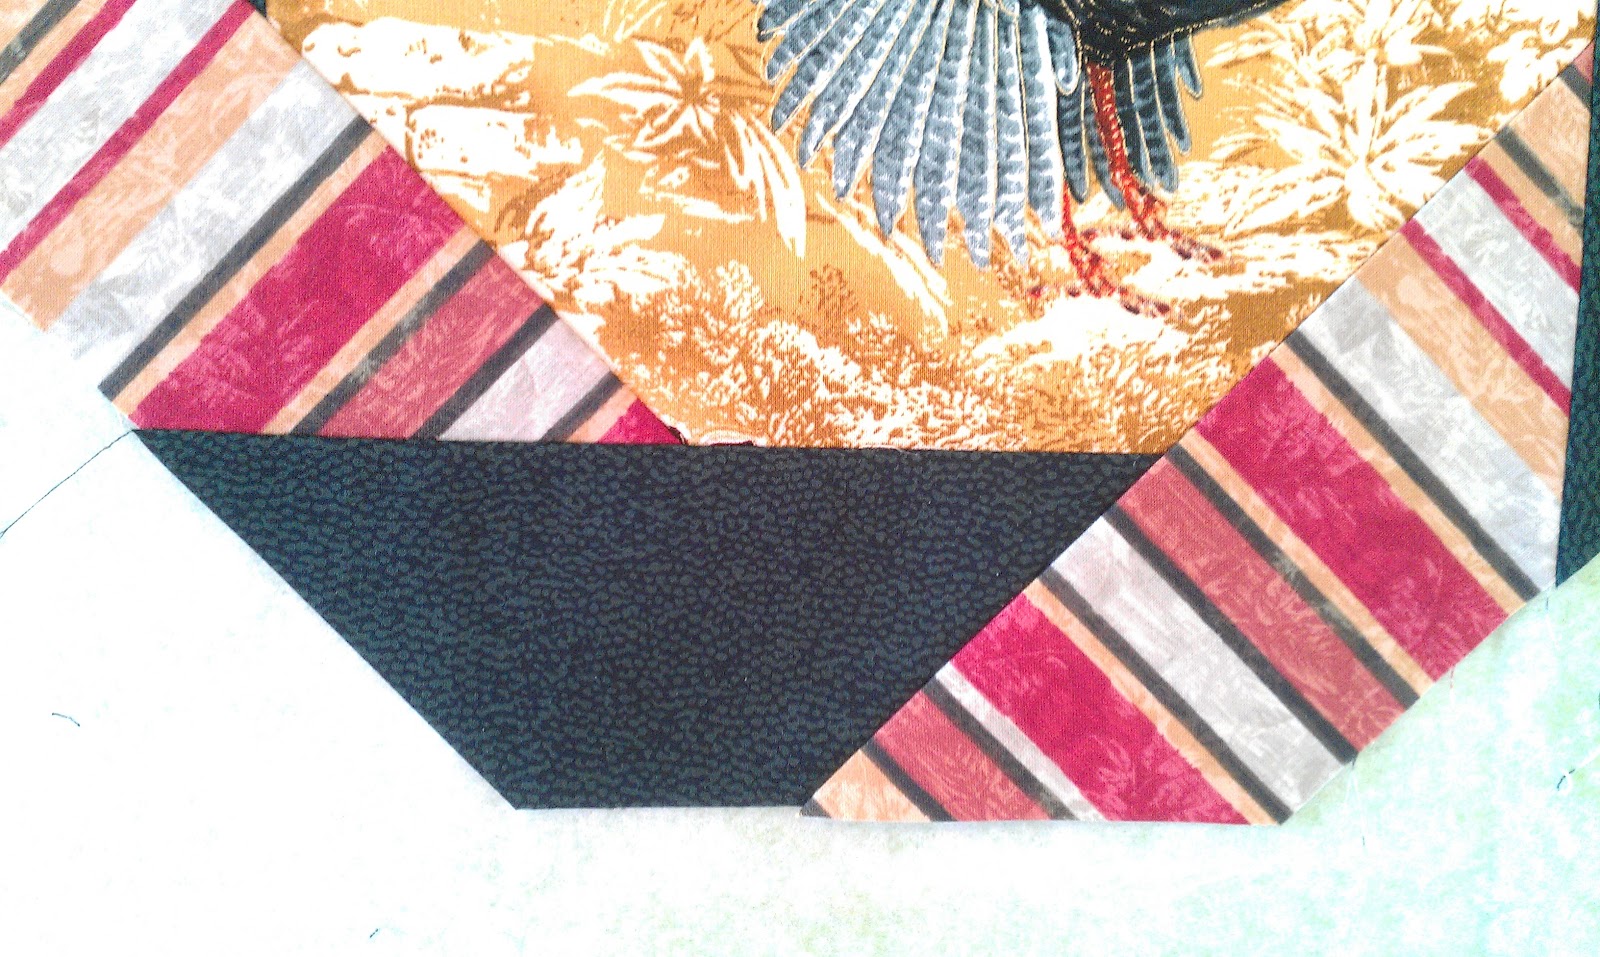
The turkeys are a lot more vibrant than they appear here, and that dark fabric is actually a very deep black-green, with a hunter green speckle. It doesn't photograph well, but it matches up with the turkey's feathers very well (in real life). 

So until after I got my basic pieces cut, I didn't realize I'd need a little bit of 45º know how. I don't know what I was thinking I'd be doing method-wise to put it together, but I guess it just didn't occur to me that a 45º cut would be a possibility. Siiiiiilly me. 

 See? When it's broken down (the above is the first round) you see the definite need for a 45º cut. So, how on earth did that work out using that line? Because, I mean, I'll be honest, my method was to just eyeball it until I read through the instructions. Imagine that. But all you have to do to guarantee your cut is on that 45º and correct for the next round is get that 45º mark on your ruler lined up with your seam, and then line up the corner of the rule with the edge of the fabric the cut will need to equal. Then all that's left to do is hunker down and take the cut. Easy peasy. See?:


 So here's Round 2. Maybe I'm one of those "looking for faces in clouds" people, but uh, is it just me, or at this stage does it look like a swastika? The pattern stops here with a note that says if you want it bigger cut a few more strips. ....I went out into the living room after I got to this part and asked JOhn what he thought of it. He said he liked the colors, and I asked if it reminded him of anything else, perhaps...and he immediately said, "Swastika." Soooooo....there you have it:

So I went ahead and added the third round. I like it MUCH better. I wish the colors photographed better, but I assure you, it's very fallish and it really does match.

The pattern itself leaves a little to be desired in terms of instruction, it's not always clear as to how to put it together, but on the other hand, it wasn't difficult to figure out. Once I got my fabrics cut, piecing the whole thing too all of maybe an hour, hour and a half. So it's a quick and reasonably simple pattern to make, so if you need a quick bit of decor to freshen up your seasonal home or a quick gift for someone...this is a good bet!
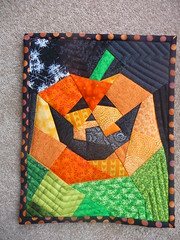
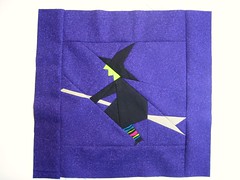
Friday, July 20, 2012

Hand-Me-Down UFOs

Lately a very common statement I hear at the shop and with quilting friends is that either A) they need to use up their stash, or B) they want to finish UFOs before getting anything new. I've even tried to commit to those ideas too, with medium style success.

But even with a lot of determination, we look at our old projects with mixed emotions. Sometimes we see them with renewed vigor and get back on track ...but then other times... we look at those unfinished projects and just groan and shove it back to the back of the bin. And if we reeeeeeally never want to see the project again, we "donate" it to family or friends who sew and who we hope will finish them so we don't have to!

Well, in the past few months lots in my life and in the lives of my family and friends has changed - people have moved, gotten ill, had surgery...all that great life event stuff. So as folks cleaned out their sewing rooms and revisited those UFOs, I ended up taking a handful of them and I'm glad I did! They may have hated them, but I sure don't. Some of them are sets of completed blocks, and others are close to finished.

Here are a few of them. Looks like I've got my work cut out for me!

This one is an old project of Mom's that she started when I was...a toddler? It's definitely from the early 90s and it was one she utterly detested. So instead of her scrapping the blocks, she gave them to me to do whatever with...so I made it. All I added were the borders:


 This one is another from Mom. She just decided she was never going to get to again and again, instead of roundcanning it, she gave it to me to finish. Really all that needs done is stitching the applique down:


And this one a customer brought in for me. She just wasn't happy with where it was going, had run out of fabric and was just not inspired to ever work on it ever again. As luck would have it, another customer completely unrelated to the one that gave me the quilt to finish, gave me the very same fabric the other quilter had run out of - 6 1/2 yards to boot!


So if you really hate one of your UFOs, you might just find it a home with someone else! Not me though...looks like I've got plenty to keep me out of trouble :)


Wednesday, July 18, 2012

We All Got 'Em; My Very First Quilt

In the great scheme of things, I'm a pretty new quilter. Sure, I've been around quilts, quilters and quilting my entire life, but it wasn't until about 4 years ago (when I was 21) that I really got into quilting at all. Logic says that it was around that time that I made my very first quilt...but that's not the truth. I still have my first blocks that I paper pieced with my mom from when I was 6. Let's just say that while my seams were all right, my color choices were enough to gag a maggot.

But I started my very first quilt about 9 years ago when I was 16. It was a yellow brick road style pattern, super simple and Mom had picked some cute Halloween prints from her stash to entice me into actually wanting to sew. It lasted for a few days until I realized that, hey, sewing isn't as easy as it looks! I got all my blocks sewn, but good lord was I terrible at it! My seam allowance was all over the place, my pressing left something to be desired and I managed to stretch those pieces into oblivion. I quit. A few years later I laid the quilt out and sewed the blocks into rows, and attempted to put the rows together only to find I was still terrible and nothing matched! I stuffed everything into a bag and didn't look at it again until 3 years ago. it was then that I took apart the rows and some of the blocks and fixed some pretty glaring errors that just weren't "workable." I got sick of looking at it and moved on to other things. About a year and a half ago I picked and put on an inner border, and away the quilt went. Well, after 9 years, 2 months ago I selected and put on the outer border and gave it to Frances to quilt.

Nine years later...my very first quilt is done. We chose a star pattern and a variegated thread to pop in the borders. As far as I was concerned, the quilt could only look better with quilting since it was so wavy and wonky from my lack of skill and patience. But now it's done and all it needs is binding!


Guatemalan Flora Row Quilt

I know, I know, I promised a long time ago to update more, and well, after getting let go from my job (not at the shop)...let's just say that just because you're technically unemployed it doesn't mean you aren't crazy busy! I wish I could say I had more time now than ever to sew, but sadly, that's simply not the truth. I've gotten a few projects done (or mostly done) and this is one of them.

Guatemalan Flora is a line of fabric from Robert Kaufman, and yeah, it's about a year and a half old...about as old as this sample is. It got pushed, as many do, to the back, back, back, waaaaaaaaay back burner as more urgent projects took the lead and this one sat and figuratively molded on my UFO shelf. Okay, who am I kidding? I have a complete set of shelves dedicated to UFOs. I wish I were kidding....I'm not.

But back to the quilt! This fabric came with a lot of great, large scale graphic florals and stripes, but the fabric I chose was a large border stripe with lots of littler rows with the larger ones. A lot of times we see these big stripes and think, "Well, this is only good for a border really," and we get stuck in a borders rut. But these large border stripes can be fussy cut into blocks, or a length of yardage to make into a row quilt, which I chose to do. Row quilts get scoffed at quite a bit simply because of their simplicity, and I don't think that's quite right. Even though they're about as simple as you can get, they can have a real impact and they don't have to just stay in long rows either! I cut mine apart and put large strips in between to break it up. But it made a large quilt very quickly and after it sitting on that shelf for months and months, it was totally pieced and ready for the quilter in an afternoon.

 I interuppted the stripe pieces with coordinating fabrics from my stash to get it to the size I wanted, since using only the rearranged stripe pieces it fell a little short.

 Here you can see the scale. In the upper left corner is my wastepaper basket and the right, my dresser. It's pretty large!


Now it's quilted and I thought I took a picture of the quilting, but I apparently didn't, so I'll have to update with a picture of the new quilting. Frances used a fantastic floral pattern and a really gorgeous variegated thread. All it needs now is the binding!