Tuesday, December 31, 2013

New Year, New Goals

So the ball drops in a little under 45 minutes and this is the time we all take to reflect on the past year and to make goals for the new year.  So was 2013 a good year? I guess good is subjective - it had its ups and downs.  I don't generally get too personal on here, but here we go.

What did I learn in 2013? I discovered that I enjoy the challenge of scrap quilting, and I've made several and have several in the works for when I have time.  I have become more confident in my work and my know how at my job outside of the quilt store.  The hardships of this year definitively taught me who my real friends are and that not all the people who call themselves friends turned out to be the swell folks they played themselves out to be.  I realized that I chose the wrong major and that maybe it might be time to go back and fix that.   I also realized that I haven't taken care of myself mentally, emotionally or physically the way I should, and its time to get my life back on track.

So what are my goals for 2014?
1. I will be taking more time to take care of myself - from seeking help for my struggles with anxiety, to being more physically active, to making an effort to slow down and enjoy my little bits of downtime more constructively.

2. I want to reconnect with old friends and make new ones.

3. I will master the curved seam. I will.

4. I want to focus on finishing or retooling old UFOs. If I love them, I want to try and finish them.  If I'm not so wild about them, then I want to try and rework them to make them what I want to be. Will I get through them all? Probably not, but I want to make a better effort.

5. I will work on saying "No" when I need to, and realizing that i have the same right to say "no" like everyone else without feeling super guilty.

So here is to a happier and healthier 2014 - I hope the new year brings you all the happiness you deserve! I hope everyone has a very happy and safe New Year's Eve!

Tuesday, December 17, 2013

A Quilter After My Own Heart

WHY did I not read The Bitchy Stitcher sooner?!  I keep it pretty clean on here...there's customers from my folks' shop that read this. But Megan Dougherty pretty much has my card. Yes, I'll be buying her book.

But on to more quilterly things...her rant about being a newbie stuck using a "line" of fabric to branching out and crossing the streams so to speak, really brings up a great point that I haven't really been able to articulate as well as she did.

Give it a read:  Line Dancing: A Rant

Thursday, November 21, 2013

Little Martha is Back!

Back in January, my little Bernina 180 (which was previously named "Little Martha" before it got replaced in favor of a bigger, beefier Bernina by the name of "Big Bertha" and passed down to me)had a terrible mishap while I was making what later became known as "The Ugliest Quilt in the World."  In the mean time, I bought another machine, which also suffered a terrible mishap while making napkins for Isabelle's wedding - I'm glad the napkins were well liked because a good machine gave its life to their cause, lol.

But just yesterday Little Martha took a trip with Jack Levin, sewing machine repair guy extraordinaire, to see if she was just a little broken, or completely totalled.  When I called to him and explained the problems Little Martha was having, he said that he'd have a look but it might be time to put the ol' girl out to pasture...and when he came and saw the main issue with the timing, all he could say was "Oh, ouch, ouch, ouch!" It's never good when those words come out of the mouth of a pro.  I let her go with low expectations, because seriously...the timing was royally, royally OFF. I expected to hear back from him today saying that Little Martha officially bit the dust.

This morning I got a message saying that my machine was...FIXED and happy as a clam.  But, after many years experience fixing all manner and quality of machines, never in his whole career (emphasis on "never," I am told) had he seen the timing in a Bernina knocked off a complete 180 degrees. Apparently, that just doesn't happen.  Welllllllll I guess there's a first for everything; as they always say, go big or go home!

But anyway, my borrowed machine can finally go back to its rightful owner, and I can stitch happily with my own machine...and in the mean time, look for a nice back up machine before something else catastrophic happens.  Someone knock on wood!


Friday, November 8, 2013

The Ugliest Quilt in the World

Several months ago, I made a quilt out of Tula Pink's Saltwater collection as a sample for the shop.  One of our more colorful characters informed us that is was "the ugliest quilt she has ever seen in her life."

Pictured: The Ugliest Quilt in the World

Frankly, I am pretty fond of the quilt..I mean...there are cephalopods (which I say just because I don't know what the actual correct plural form of Octopus is) on it.  But besides that, it really isn't an aesthetically offensive quilt, unless blues and turquoises aren't your thing.  But after that, I had an idea. What if I tried to make the ugliest quilt in the world?  How would one go about that, making an intentionally ugly quilt? That's kind of subjective, beauty is in the eye of the beholder and all that jazz, right? Challenge accepted. 

So it occurred to me...all those extra blocks from projects past, all those strips and segments from cutting said blocks, and all those practice blocks that just didn't work out were just sitting in a bag, all sad and lonely.  What if they all got mashed together?  I organized the pieces by colorway: brights, holiday and muted.  With all that, I had enough for three very ugly quilts.  So I set off on making a very bright and garish quilt.  I took my finished blocks and added pieces parts to then until the finished square measured 12.5" square. 

Let me just say, this is probably the most fun I have ever had making a quilt, EVER.  It felt so good to not have to fuss with color placement very much, or what looks good and what doesn't.  It gave me the freedom to just put things together that on an ordinary quilt, I never would have.  Plus, using leftover blocks, you learn real quick what color phases you've gone through over the years. (News Flash: I like orange and bright pink...shocking to no one.) 

And even though it was intended to be ugly and horrible...I really love how it turned out.  To everyone else, this may really be a loud, so-ugly-it-might-be-seizure-inducing quilt, but I am so happy with how it turned out. 

Say hello to the ugliest quilt in the world: 


A funny side note about the dino block...that was one of mom's leftover blocks from a project she made for me...when I was 3.  Just goes to show I have always had strange taste.  Dinos for life! 


Thursday, November 7, 2013

Free Motion Quilting Cheats!

In the past few months, I have been doing a lot of my own free motion quilting, whereas I hadn't before. Unfortunately, the professional quilter I gave quilts to the most was out of commission for a little bit, and with my other preferred quilter having quite the backlog, I decided I should probably try and do my own work.  I mean, I'm using a machine that can do it, and I do have some free motion experience, so why not, right?  I figured the pieces would be nice and high on the wall at the shop where no one could see all the mistakes and the uneven stitches, etc...right?

My feathers turned into chunky, funky vines, whatever. 

Well, apparently I sold myself short. The response from people seeing my home-quilted quilts has been overwhelming!  People liked it, and were shocked I was doing this on a domestic machine. The truth is, I still don't think I'm all that great at it, but I do love the free motion quilt.  I can't handle much more than a small throw quilt without difficulty, and I still haven't mastered the even stitches bit even with a stitch regulator, but I love it.  I think it is my favorite part of the process!

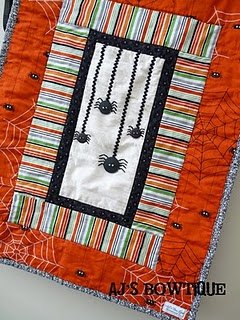
No, my quilt isn't swearing, they're just asterisk snowflakes. 

But what I keep hearing from people looking at the few quilts I have up that I've quilted myself, is that they wouldn't have any idea on how to fill the space, and they wouldn't be brave enough to freehand the design. Well, yes, I'm not using a stencil or a computerized design, so technically, I am free handing the designs, but I'm most definitely not brave enough to completely freehand just yet! BUT...I do have a few cheats to share for those of us just starting out in free motion and for us not feeling confident enough just yet to 100% freehand.  Here we go! 

Free Motion Quilting Cheats

1. Pinterest really is a wonderful, wonderful thing.  If you're feeling stuck, pop on there and you can find a world of free motion designs to inspire you.  I have spent countless hours looking up designs because my arsenal is limited. Just search "free motion quilting" and you'll find yourself sucked right in. 

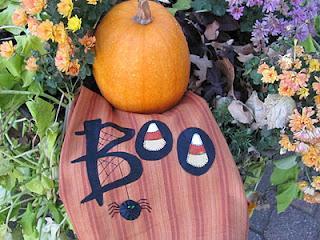
Exhibit A, found on Pinterest. 

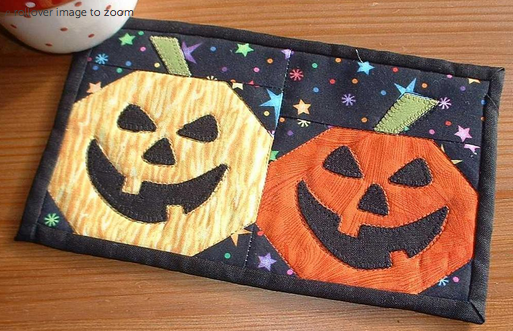
2. Let your fabric and pattern work for you. Does your fabric have an interesting design, or does your pattern have its own funky natural lines?  Follow the leader and stitch around those patterns.  

3. I'll be honest...the Press and Seal trick did not work for me at all, not even one measly bit. It didn't slide underneath my quilting foot very well, and got bunched up even when I eased up the pressure on the foot. Also, when I tried to move the fabric around the design, the wrap didn't stay put and it moved with my hands. Oh, and that stuff is a pain int he ass to get out of your stitching...I ended up doing more damage to my stitches than I did to the Press and Seal, even trying to be delicate with tweezers! 

Please accept a picture of some Scottie puppies as a completely adorable substitute. 

4. If you can audition patterns, that is really, really helpful.  That's probably, in my opinion, what the Press and Seal is best for.  But, it is translucent and you don't get a good feel for how the pattern looks on your quilt.  My solution was overhead projector sheets.  Yeah, yeah, I know, how has those anymore? I've had these babies laying around since my junior year of high school...and only just found a good use for them. 

Sorry...I mean these....


But they're 100% clear and you can use Sharpie, a dry erase marker, or an overhead marker to trace out the design, or designs, you're toying around with. This will give you a much better idea of how your design will look on your quilt without ever having to take a stitch, and with zero marking on your quilt.


The pitfall is that you shouldn't really sew over these...they're quite stiff and getting the plastic out of your stitches would be at very best a nightmare. Once you get the idea of how it will look and what you want, it's time to be brave and dive in, or...

5. You can always you a washable fabric pencil, or water soluble marker to draw your design directly on the fabric. You can stitch right over it and wash it off when you're done...or, with all of that handling, it may wipe away on its own as you work.  This is best done in chunks because as you handle the quilt, especially if you opt to use a fabric pencil, it will wipe away...so it's best not to spend all your time drawing out the whole quilt only to have it fade away.

6. PRACTICE, PRACTICE, PRACTICE. Before you even sew a stitch on your quilt, make yourself a "test quilt" to make sure your tension is in order, and to make sure you know how to actually do the design you want.  When I make a "test quilt" all it is, is a 14" x 14" or so piece of scrap batting with scrap fabric on either side to act as the quilt top and back.  That way you are practicing on roughly the same materials as your quilt is made from.  Get you design down, your tension right and your courage up and you're ready to roll! 

Wednesday, November 6, 2013

Workie Work, Busy Bee

So...now that we've all had our fill of Halloween goodies...we're back to our regularly scheduled programming.

I've been busy at work on new samples, a few wedding quilts (no pictures because those folks read this blog), and an experiment in quilting weirdness.  But it was time to get in gear for Christmas, and let me tell ya, it felt really bizarre working on Christmas things while I was trying to enjoy my favorite spooky season.

Stonehenge Christmas table runner panel.  I wasn't really wild about the panel itself, but I was asked to do it as a sample.  The quilting made it a little more interesting, I think.

Little circles on the border.  They're not perfect, but half decent for a second attempt. 


Thursday, October 31, 2013

Lovely Frankenstein's 31 Days of Halloween: Alien Brain Hemorrhage Shot

It's Halloween and after all of our diligent decorating and party preparing, it's time to celebrate with a drink...which, I'd probably wait for later tonight to partake in...

Introducing the creepiest drink I've seen yet...Alien Brain Hemorrhage.


Get your Bailey's, Schanpps, blue curacao and grenadine ready and enjoy! 

CLICK HERE to get the recipe.

Happy Halloween everyone, have a spooky and safe night!


Wednesday, October 30, 2013

Lovely Frankenstein's 31 Days of Halloween: 17 Halloween Treats That Ruined Your Childhood

Buzzfeed is a great time killer (trust me) and this time it brings us the 17 (almost) universally hated candies that trick or treaters get...beggers can't be choosers, but let's be fair, we all had the candies we always tried to trade away because, well, gross.

I gotta say, I like Whoppers, Dots and Mr. Goodbar.  But Good and Plenty, and Necco Wafers?  Ick.  But personallyI'd add those weird peanut butter candies in the black and orange wax paper wrappers...

The absolute worst.

...black licorice of any variety, red hots and those strawberry hard candies that are wrapped like strawberries.

Gross.

But that's just me...what are your thoughts? READ ON here!

Tuesday, October 29, 2013

Lovely Frankenstein's 31 Days of Halloween: Witch Curtain

Here's another one from Martha.  Set this up just in time for trick-or-treaters for some scary ambiance on their way to ringing your doorbell. Pop some colored lightbulbs (red ones, strobing or blacklight?) in and you're good to go!


CLICK HERE to see how it's done. 

Monday, October 28, 2013

Lovely Frankenstein's 31 Days of Halloween: Eyeball Glasses

Creepy and perfect for your grown-up Halloween party. I'd use these for a mad-science themed Halloween party!


CLICK HERE for the tutorial. Thank you to Martha Stewart's minions for posting this!

Sunday, October 27, 2013

Lovely Frankenstein's 31 Days of Halloween: Twinkie Ghosts

Now that the great Twinkie Panic is over and Twinkies are once again available, you can make this cute little Twinkie Ghosts for kids' Halloween parties...or your own if Twinkies are your thing! I'm not big on Twinkies (I don't like them at all, actually) but John does, so John, these are for you, lol. 


CLICK HERE for the how-to. Thank you to Amber at Crazy Little Projects.


Saturday, October 26, 2013

Lovely Frankenstein's 31 Days of Halloween: Sweater Pumpkins

If a more chic and trendy Halloween is more your bag of candy, then these sweater pumpkins are for you!


CLICK HERE for the tutorial. Thank you to Nita at Mod Vintage Life for sharing.

Friday, October 25, 2013

Lovely Frankenstein's 31 Days of Halloween: Handkerchief Ghosts

Here's an oldie but a goodie...making handkerchief ghosts from empty recycled toilet paper rolls.  They're way cute, and you could very easily light them up with a glow stick. Plus, it's another project that's great for kids.


CLICK HERE for the tutorial. The first set of instructions are in Swedish (I think...it's a .se website) but underneath the instructions are translated into English. Thank you to Karin and Freya for sharing!

Wednesday, October 23, 2013

Lovely Frankenstein's 31 Days of Halloween: Pumpkin Mug Rug

Perfect for your pumpkin spice lattes!  Or, if you wanted, you could split it up and make some coasters instead, if mug rugs aren't your thing.


CLICK HERE to get the free pattern.  Thank you to whoever posted this to I Sew Free, since no name was provided.

Tuesday, October 22, 2013

Lovely Frankenstein's 31 Days of Halloween: Halloween Cross Stitch

While this cross stitch pattern is great on its own, who ever said you can't take a cross stitch pattern and convert it to patchwork?  Choose your raw square size, and get to work!


CLICK HERE to get the free pattern.  The site is largely in French, but it is quite understandable (I don't know a lick of French) since it shows everything in pictures.

Monday, October 21, 2013

Lovely Frankenstein's 31 Days of Halloween: Knitted Zombie

My knitting skills are lacking, but I know someone out there would love to make this!  It's a creepy, accurate little knit zombie right down to the eyeball and entrails...perfect for the Halloween lover, or even a Walking Dead fan!

CLICK HERE for the free pattern.

Sunday, October 20, 2013

Lovely Frankenstein's 31 Days of Halloween: Hooded Dragon Cape

Yes, this may be a kid's costume, but I intend to modify it for grown up sized people...like me...we dress up at the office and this awesome dragon cape would be office appropriate, functional (with a little modification) and absolutely perfect!


Oh, and it would be great for all the kiddies and grandkiddies out there too who are resistant to wearing a full on costume.

Thank you to Jennifer at eat.sleep.MAKE for sharing.

CLICK HERE for the tutorial

Saturday, October 19, 2013

Lovely Frankenstein's 31 Days of Halloween: Frankenzombie Treat Bag

It's so sad to me that the face of trick or treating has changed.  I remember going out as a kid with Dad around the neighborhood, and when I was a little older, with friends.  Nowadays everyone is so scared over letting their kids out (unsupervised?!) that trick or treating is relegated largely to parking lots and shopping malls.

Even still, those trick or treaters need a little something flashier than those plastic pumpkins. This Frankenzombie fits the bill!


Thank you to Louise from I'm Feelin' Crafty for sharing!

CLICK HERE for the tutorial. 

Friday, October 18, 2013

Lovely Frankenstein's 31 Days of Halloween: Knitted Halloween Washcloths

Over at Craft Gossip, they've complied a handful of links to blogs that have some cute patterns for knitted Halloween washcloths. 


I am a terrible knitter...really, really terrible...but someone who CAN knit would sure have some awesome themed washcloths for the Halloween season.  They would also make a great gift for someone else who super loves Halloween...I like the skull one...hint hint hint :-)

CLICK HERE to get to that tutorials!

Thursday, October 17, 2013

Lovely Frankenstein 31 Days of Halloween: Wolverine Costume Claws

If you know me well, then you know that in my book, Wolverine is thee coolest superhero ever. 

The Wolverine of my youth...yellow spandex and all...which, spoiler alert, would make a GREAT Halloween costume

But modern Wolverine kicks every single ass...and can grate cheese on those abs. 

But all I know is that when I have kids, because they will absolutely be the coolest (and nerdiest) kids in town, one of them will end up in a kiddie Wolverine costume. And when they do, they can have these kid-safe Wolvie claws!  
 
 
They may not be adamantium, but hey, we all can't be THAT good.  If you know of a little one that wants to be the most awesome kid in the trick-or-treating group, or even one who just wants to be a superhero for a day, there is a good tutorial on how to make these claws kid-safe.

Thank you to Allie at Freshly Completed for sharing this!
 
CLICK HERE to get the tutorial

Wednesday, October 16, 2013

Lovely Frankenstein's 31 Days of Halloween: Monster Madness

If done in the right fabrics, this would be a really cool, kid friendly Halloween quilt.  You could make some of the eyes angry, or scared or just plain bug eyed, and how neat would it be to use some of that glow in the dark fabric or thread for the eyes?

This pattern is for sale over at Reanna Lily DesignsCLICK HERE to purchase the pattern.

Tuesday, October 15, 2013

Lovely Frankenstein's 31 Days of Halloween: Halloween Street

This wallhanging just begs for some spooky embellishments.  While the pattern calls for specific fabric lines, you could very easily do this with any Halloween fabric you choose, and could adapt it to be as large or small as you wanted. 


I could see this being an equally cute Christmas pattern too...Hmm!

Thank you to Gigi Khalsa for sharing this with Quilter's Newsletter as a freebie!

CLICK HERE to get to the PDF.

Monday, October 14, 2013

Sunday, October 13, 2013

Lovely Frankenstein's 31 Days of Halloween: Happy Pumpkin Pillow

If spooky Halloween isn't your thing, then this is a good project for you.  This happy little pumpkin makes a great pillow, or would be cute as a wall hanging or even as placemats. 

Thank you to Lisa DeBee Schiller for sharing.

CLICK HERE for the tutorial over at All People Quilt.

Saturday, October 12, 2013

Lovely Frankenstein's 31 Days of Halloween: Ghost Runner

This is a quick, cute appliqued table runner.  You could change up the length of the runner, and the face of the ghost really easily to make it your own. 


Thank you to Debbie Williams at eHow for sharing!
 
CLICK HERE to get the the tutorial!  Click on the picture to get to the next step.

Friday, October 11, 2013

Lovely Frankenstein's 31 Days of Halloween: Halloween Hexi Table Topper

Hexagon patterns are still as hot as ever, and here's a cute pattern to add some style to your Halloween decor.


Thank you to Amanda Castor at Material Girl Quilts for sharing!

CLICK HERE for the tutorial.

Thursday, October 10, 2013

Lovely Frankenstein's 31 Days of Halloween: Applique

Pinterest is AMAZING.  There is so much to see there, so many great patterns and ideas for the pinning.  The downside to it though, is sometimes things get pinned without a link to a pattern, or any credit to the designer. 

Such is the case with this quilt. 


I have no idea who designed it, what pattern it is, if any.  All I know is the blocks are made from Moda's Spooktacular line from 3-4 years ago, and probably a layer cake of it.  So, if anyone knows what pattern this is or who designed it, please speak up! 

But the point is, is that is is a very simple quilt.  Just squares and sashing.  But look what happens when the single appliqued spider is added over the top of the finished blocks?  WOW!  The spider and the quilting took this quilt from basic to brilliant! 

So there's some food for thought...for any quilt, not just a Halloween quilt. The addition of a large scale, single applique over the top of a simple quilt really takes to the next level. How cute would it be to add an ornament, or reindeer over a simple square Christmas quilt? 


Wednesday, October 9, 2013

Lovely Frankenstein's 31 Days of Halloween: Cross Stitch Pillow

This would be great for your sewing room during the spooky season.


 I don't know about you all, but my sewing room doesn't have the amenities for a pillow, so I would make this as a wall hanging, or framed cross stitch.

Pamela at Our Pioneer Homestead designed this pattern and was kind enough to share it for free. Thank you Pamela! 

CLICK HERE to get the pattern.

Tuesday, October 8, 2013

Lovely Frankenstein's 31 Days of Halloween: Ghostly Ghoulash

Even ghosts have to scare up some grub!  This little wall hanging would be a fun addition to your Halloween kitchen.


This is a pattern available for purchase at Maudie's Cottage.  

CLICK HERE to get to the patterns - the one you're looking for is toward the bottom of the page, and is called "Ghostly Ghoulash!"

Monday, October 7, 2013

Lovely Frankenstein's 31 Days of Halloween: Spooky Felt Garland

LOVE this.  It would look really cute on a mantel or over a doorway...for parties or just because!


Thank you to Anjeanette at Roots & Wings Co. for sharing!

CLICK HERE for the templates
CLICK HERE for the tutorial

Sunday, October 6, 2013

Lovely Frankenstein's 31 Days of Halloween: Felt Treat Bags

 Believe it or not, Target apparently has craft tutorials. Todd Oldham has a step by step guide to make these cute little treat bags.


I know I would have squealed over this as a kid.  Well, okay, let's be fair...I squealed over this as a grown ass woman.  I don't have anything to use it for, but it sure is cute!

CLICK HERE for the tutorial.

Saturday, October 5, 2013

Lovely Frankenstein's 31 Days of Halloween: Free Halloween Printables

Printables are great...grab a pack of your printable fabric and go to town! As with any printable, if you intend to sell anything with the images used on it, make sure they designer allows for that kind of usage of their art.

Cool, right?  There's this and more, from vintage to artsy and creepy to cutie!

Thank you Karen at Graphics Fairy for sharing!

CLICK HERE for the images!

Friday, October 4, 2013

Lovely Frankenstein's 31 Days of Halloween: Bite Me Cross Stitch

For those of you with a saucy sense of humor and a little bit of attitude...this is the cross stitch for you!


Thank you to Lady Kell at Kincavel Krosses for sharing!

CLICK HERE for the pattern.

Thursday, October 3, 2013

Lovely Frankenstein's 31 Days of Halloween: Halloween Dresden Plate Block

How cute is this Dresden plate table topper!  I'm going to have to give this one a try...or just use the Dresden Plate block itself and make a whole quilt...I have way more than enough Halloween fabric to do it with! 


Thank you to LuAnn at Loose Threads for sharing!

CLICK HERE to see the tutorial.