Showing posts with label Learning Experiences. Show all posts

Wednesday, July 18, 2012

We All Got 'Em; My Very First Quilt

In the great scheme of things, I'm a pretty new quilter. Sure, I've been around quilts, quilters and quilting my entire life, but it wasn't until about 4 years ago (when I was 21) that I really got into quilting at all. Logic says that it was around that time that I made my very first quilt...but that's not the truth. I still have my first blocks that I paper pieced with my mom from when I was 6. Let's just say that while my seams were all right, my color choices were enough to gag a maggot.

But I started my very first quilt about 9 years ago when I was 16. It was a yellow brick road style pattern, super simple and Mom had picked some cute Halloween prints from her stash to entice me into actually wanting to sew. It lasted for a few days until I realized that, hey, sewing isn't as easy as it looks! I got all my blocks sewn, but good lord was I terrible at it! My seam allowance was all over the place, my pressing left something to be desired and I managed to stretch those pieces into oblivion. I quit. A few years later I laid the quilt out and sewed the blocks into rows, and attempted to put the rows together only to find I was still terrible and nothing matched! I stuffed everything into a bag and didn't look at it again until 3 years ago. it was then that I took apart the rows and some of the blocks and fixed some pretty glaring errors that just weren't "workable." I got sick of looking at it and moved on to other things. About a year and a half ago I picked and put on an inner border, and away the quilt went. Well, after 9 years, 2 months ago I selected and put on the outer border and gave it to Frances to quilt.

Nine years later...my very first quilt is done. We chose a star pattern and a variegated thread to pop in the borders. As far as I was concerned, the quilt could only look better with quilting since it was so wavy and wonky from my lack of skill and patience. But now it's done and all it needs is binding!


Wednesday, August 31, 2011

VICTORY IS MINE!

Happiness is finishing a project you didn't think you had the skill to do, and not only that, but doing it well.
I'm really, really happy with how this tunred out, and I don't have any [major] oopses. The hand embroidery is a little shaky, but that too will get better with practice and maybe a little stabilizer too.

Thursday, August 18, 2011

Fooooooooooooons!!!!!!!!!!1!!!

In regards to not paying attention to sewing a flying geese block and sewing the top shut: "Well, I MIGHT have done that once. Maybe 15 years ago." Well, Marianne Fons, I'm happy for you that you might have made a quilting mistake a whole 15 years ago. #quiltingperfection.


I suppose I ought to explain that video and how it applies to this moment of snark brought to you by OPB and Fons & Porter's Love of Quilting.

Okay, so Sheldon (a main character in my favorite show, The Big Bang Theory he's a socially inept theoretical physicist known for his unwitting tactlessness  as well as his bizarre OCD-like idiosyncrasies, who according to Mom I'm "like" sometimes for the latter) is to Wil Wheaton (actor from Star Trek: Next Generation, and notoriously nice guy in real life, but plays Sheldon's arch nemesis and royal jerkface) as I am to the TV personalities of Marianne and Mary Fons - maybe they're super nice in real life like Wil Wheaton but they're just so condescending on TV and it drives me batty and makes me laugh at the same time...it brings out the snark in my sense of humor I guess! Maybe I won't feel that way when it's been 15 years since I've erred in sewing something ;-)


Wednesday, August 17, 2011

Ripping out stitches builds character...and also rage.

I really, REALLY need to learn to pay more attention to things when I'm sewing and not be so danged persnickety. Yeah, yeah, I know...easier said than done.

So I'm doing a quilt from a pattern called "Wednesday" (I can't find a picture of it for you but I assure you it's super cute), which is meant to showcase a large-scale print. Clearly I had to do this in Halloween...I mean, hey, even the pattern called for Halloween fabrics. You know I'm more than happy to oblige :-)

So I'm using Alexander Henry's line, The Ghastlies to make it all up. I LOVE that fabric.. That little girl with the hammer just cracks me up. But the quilt I'm doing (pictures up soon, once I rip it all out...ugh) is gray, pink, black and green. It sounds odd for Halloween, I know, but click on the link and you'll see why!

Aaaaanyway, so last night I'm just stitching away and I'm putting everything together and I realize "&*%#! The center strip is too big in a weird way!" So I'm sitting there pinning like a madwoman trying to force this pice to fit with the two  large upper and lower blocks lining up in the center of the middle block in the strip. Well sta-hoo-pid me, they weren't supposed to, and I realized this AFTER pinning, sewing and assembling the quilt to the point of having the last border halfway on.

Damn. It. Damn it. Dammit.

So, erroneously thinking I'd have a completed quilt top this afternoon to give to Frances to quilt for me, I will instead be spending my afternoon ripping out multiple looooong seams and finishing it tonight. Oh, and did I mention I cut the long sides for last border from my [very directional] border fabric last night out twice, so now I don't have enough to do the short sides without getting more fabric?

You know, perhaps I shouldn't be quilting and watching Gangland at the same time late at night. lol. Ah well, I see this as a good, patience building exercise (albeit a frustrating one!)

Friday, July 1, 2011

Top 5 Techniques that Look like Fun (but I haven't tried yet...)

I've said it before and I'll say it again...I'm hopeless addicted to the wild, weird world of quilting. Heck, if that's not apparent all ready, then perhaps I've been understating things (though, really not something I'll ever be accused of doing...ask my family/friends, I'm a spaz!). So while I've been piecing and appliqueing and quilting to my little heart's content, I've seen some other techniques that I really want to try...but haven't (yet). So, here they are (in no particular order of course):

Top 5 Techniques that Look like Fun (but I haven't tried yet...)

5. English Paper Piecing
I've all ready tried regular paper piecing, but this English Paper Piecing thing keeps rearing its head. Every now and then at the shop, someone will come in looking for english paper piecing supplies, and as a matter of fact, yesterday Loretta Orsborn was in our shop teaching a class, and she showed Mom and I an English Paper Piecing project she was working on and let me tell 'ya....it was cool! It made me want to try it, maybe not on the larger scale she was doing it at, but maybe a wall hanging? For a hand-sewing method, a wall hanging is probably all my attention span can handle. But it looks like a really simple technique and I really love how precise it is without seeming to be overly complicated. It looks like the prep actually takes the longest!


4. Ice Dyeing
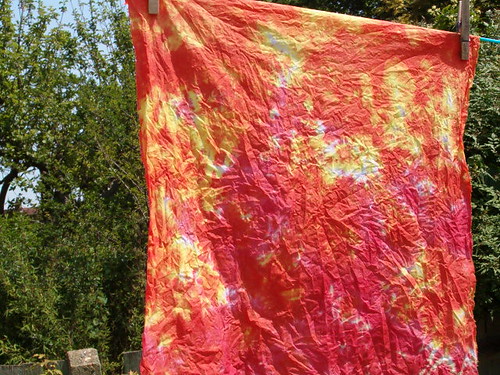
I flipped right out when I saw this...you can dye your own fabric, pretty much mess free if you do it correctly, with the ice cubes in your freezer and powder dyes. What the heck?! I love the results! It's similar to tye-dye but without being overly ... tye-dye-ish, if that makes sense. This is a lot less planned. With tie-dye, you can make certain designs based on how to fold or twist the fabric and tie with rubber bands, and you apply the color directly where you want it - with the exception of the twist of the fabric, you pretty much know where the colors will be and how they will interact (since the dye is liquid, you see how it'll blend right away). With Ice Dyeing, the dye is a powder and rests on top of the fabric and dissolves and falls where it will as the ice melts - you can kind of guess where you want a particular color to be but ultimately it just goes where it goes and there is no "planned" pattern to it. It doesn't lend itself to the twisting and tying that tie-die does, because you need the looser folds to allow the powder the seep through.  I couldn't find a video tutorial for this, but if you click on the "Ice Dyeing" link, that is the best tutorial I have seen for it.


3. Hand Embroidery
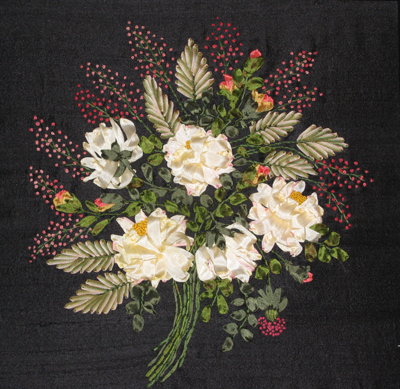
Okay, so this one isn't ENTIRELY true. I have tried it. All I've done is a back stitch and an absolutely pathetic stem stitch (gotta work on that!). But have a looksie at the above link and check out these video tutes...how flippin' cool?! Embroidery is always a nice touch when embellishing a quilt - it can be whatever you want it to be and while it can look very modern with clean lines, it gives just a hint of the traditional which is really quite nice. I think the coolest part about embroidery is the fact that it has been done for literally thousands of years - we do it now, the Victorians did it, the ancient Chinese and ancient Egyptians did it, the medieval cultures did it and there is even evidence that early man had the ability to do it as well. Plus, there is no denying that hand embroidery can be absolutely elegant or wonderfully simple, so it caters to all skill levels.


4. Set-In Seams
Fine, fine. This one isn't all the way true either. I've tried this and you should have heard the fit I had. This is just the most ridiculous thing, it really is (okay, fine, so I'm still a little bitter). Set-In seams and Y-seams are pretty much the same thing far as I can tell, and using this technique can yield some pretty incredible results.. The thing I want to do with this, actually, is my mother's specialty - the Lone Star Quilt. She can practically do these in her sleep, Set-In Seams and all and have it turn out practically perfect. It comes with experience (and *groan* paaaaatience) I think. I'me working on the experience thing, but I think the patience with myself and with my projects is something that I'll forever lack. Anyway, maybe once my bitterness and rage (Hyperbolic much? Geez.) subside with these stupid seams I'll give it another go and make a sweet Lone Star!


5. Reverse Applique
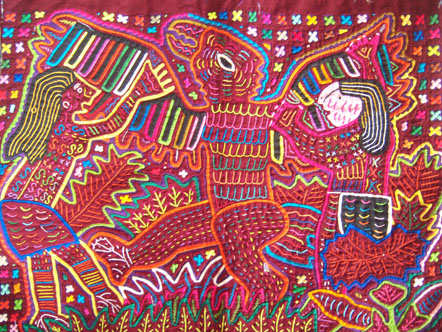
Oh my goodness, have you ever seen a quilt all done up using this technique? It can range from cutesy to complicated and can be used as the focus technique or as embellishment. No matter which way you cut it, it's neat! I remember in Miss Parker's 7th grade art class, we had to do this technique using paper and an X-Acto knife to emulate (what is probably the most famous example of reverse applique) the Molas made by the Kuna people of Panama and Colombia. Their work is absolutely amazing. It's bright, it's intricate ...often imitated but never equalled. Aside from the Molas, this is just a funt hing to try and I think I (eventually) will!

Wednesday, June 29, 2011

Darwin gets a new friend and I get to rip out stitches.

My roomate Lauren (yeah, I know) just got a new dog to keep Darwin company, and he's so FLUFFY I'm gonna die!
Say hello to Charles :-) Or Char. Or Char-Char. Or CHARMANDER! lol.

You know you live in an anthropology and science nerd house when your dogs are named Charles and Darwin. Hehehe. I love it! We call him Charlie though. He's adorable and Darwin likes him so it's a win-win. Woo hoo! Now if only we could take them sailing on a pint sized Beagle...(if you're a super nerd like me you'll get the reference...the Beagle was the ship that Darwin sailed to the Galapagos on). Aaaanyway...

So we have a bus hailing all the way from Texas coming in about a week to go to the Sisters quilt show and to visit, and after a little mishap with one of my kits, I needed to hop to it and get crackin' on another on to replace the can't-use-it-now one. So I chose to do a Thimble Blossoms pattern:


Super cute, and super simple....IF you're paying attention. Well, I read the pattern no less than 5 times. Seriously. 5 times. Apparently my information retention the past few days has been something awful because not only did I sew the wrong pieces together once, I sewed the new ones on without cutting the focus blocks down, and then had to do it a third time. I forgot to cut 2 strips for the points too. Good grief! Talk about having a case of the dumb-dumbs...so I've been spending more time ripping out stitches and re-cutting things than I have actually piecing! Oh the joys of quilting ;)

It's going to be really adorable though, I'm using Alexander Henry's Sew Much Fun as the large blocks, and Robert Kaufman's Sew Happy for the block points, and then an assortment of other matching prints for the neutral blocks.
Poor lighting, blah blah blah, but I assure you it's adorable. Oh, and third time's a charm, right?

It calls for a Layer Cake, but I'll level with you: I don't like Layer Cakes much. I think they're a great idea, don't get me wrong, and I do use them from time to time. But I really enjoy the process of choosing the fabrics, and I feel very limited when it comes to Layer Cakes because all of the colors are chosen for you. They're wonderful when you need a project done yesterday or if you're not wanting to go to the trouble to pick out 30 fabrics and cut them all to size (which admittedly, can be a pain), but I enjoy the process so I'd rather do it myself.

Hopefully I'll have the top pieced today so I can send it to Carol to be quilted tomorrow, or at latest, on Friday. Whew, nothing like flying by the seat of your pants!


Thursday, June 9, 2011

This was going to be a link on the Newsletter, but it's simply too good to not post in it's entirety here.

This is an article by Sew, Mama, Sew!, one of my very favorite quilting blogs. The original controversy over the Modern vs. Traditional quilting debate started with "The Dumbing Down of Quilting Parts 1-3 HERE, HERE and HERE by Sandi at Piecemeal Quilts and it definitely struck a chord with people, myself included.
I have a pretty strong opinion about this whole thing, and I'll keep my big mouth shut, save for that I think both sides make very valid points. Please do go to Sew, Mama, Sew! and to Piecemeal Quilts and have a look around their blogs. And if you choose to comment, please be kind to both!

This is Sew Mama Sew's response to Sandi's articles. I really like how she handled it, and I think she has some good things to say. I certainly don't think she's the be-all-to-end all as Sandi puts it, but I think her messages are good.

Weighing in on the Great Quilting Debate: Three Guiding Principles

I admit, I’m often oblivious to gossip. I follow as many blogs as I possible can. I tweet and do Facebook. Yet sometimes I miss things that are kind of obvious. I saw a firestorm of debate in the quilting community, but it wasn’t until recently that I traced the controversy to a mid-March blog post and realized that Sew,Mama,Sew! ignited the spark. Yowza!
New Fangled Technology
My first job in social media.
I don’t want to go into it too much and try to address all the arguments and points of view (I can’t even begin to understand them all.) I don’t think that people should have to be nice and supportive and kind all the time and I do think there should be room for debate in the sewing community. But feelings have been hurt, some people are angry and I’m sure more than a few people feel gun-shy about what to say, what to share and what to post on their blogs. Because what we said started this debate, I feel a responsibility to chime in with my two cents. I thought I’d try to explain three principles in which I strongly believe.
Zombie Quilt
One of my early quilts.
Principle 1: Sewing should be fun!
This ain’t Little House on the Prairie and none of us are Laura Ingalls. We don’t have to sew if we don’t want to. We can sew whatever we want as many times as we want in whatever fabric we want and we should be able to write about it, photograph it and talk about it without getting any flack. And if there are parts of sewing that aren’t fun, we don’t have to do it. Some people like piecing a quilt but hate the actual quilting so they send it off to someone else. Some people love  sewing, but are perfectly happy to let someone else pick out the fabric so they buy a kit. Some people don’t want to do any math or cutting, so they buy precuts. I think you should do whatever floats your boat. Me, I’m never tracing another pattern again. I do solemnly swear I will never judge you for NOT doing the parts of sewing that aren’t fun to you. (Go ahead, raise your hand and pledge with me.)
Taking an Oath
Taking the Sew-What-You-Want pledge while Mel Brooks looks on.
Principle 2: Learning requires a certain level of discomfort.
This is something one of my graduate school professors used to say and as a mother I think about it all the time. Learning to ride a bike is scary. Learning a new language is embarrassing and exhausting. Learning  guitar hurts! Learning Calculus makes you want to bang your head on a desk (OK, maybe that was just me.) As an educator I had to keep this in mind every day. When people are learning, they’re often not happy about it because they’re uncomfortable, but a tolerance for discomfort is required if you want to learn or master anything. (Which doesn’t in any way mean that it can’t also be fun.) The wonderful thing is that when you challenge yourself it leads to growth and mastery, which most people find deeply satisfying, which is why we keep doing it.
My Happy Student
My first group of happy students.
The idea that learning and growth can be uncomfortable at times is where some of the recently frustrated and outspoken quilting bloggers and I can come together. One of the more positive and underlying messages of many of the controversial quilting posts is this:
STRETCH!
Stretch your skills.
Stretch your repertoire.
Stretch your definition of beautiful.
Leave your comfort zone and see where it takes you.
One thing I’ve been thinking a lot about lately (even before all of this started) is how Sew,Mama,Sew! needs to grow with our readers. We have always tried our best to make sewing fun and approachable to as many people as possible. I think we’ve done a pretty good job of encouraging and inspiring and involving people in the craft of sewing. But lately I’ve decided that we don’t really do enough to help people develop their skills. To stretch, grow and learn. We’re making it fun, but we’re not really making it challenging, so we’re going to try to do better. If (heavy emphasis on IF, because we still strongly believe in Priciple 1) you want to take your sewing skills to the next level, we’re going to do our best to offer you ideas, advice, inspiration and resources.
SHY
My sewing circle, aka The Sweet Hot Yams.
Principle 3: Sometimes people deserve a do-over.
I try to remember to practice this with my family as much as possible. People feel passionate about things and they get riled up. They say things that maybe they would phrase differently if they’d given themselves a little more time to work it out.  Or maybe they hadn’t anticipated the effect their words would have on others. Sometimes people deserve a chance to say what they mean in a different way.
And so, today I’m very happy to bring you an excellent post by Sandi Walton of Piecemeal Quilts. (We’ll call it the first in a series of Stretch Your Skills posts.) Sandi is an accomplished and passionate quilter. Sandi believes in STRETCH so she and her friend Jeanne of Grey Cat Quilts put their convictions into action and developed a collection of blog posts called the Skill Builder Series. So far they’ve covered 1/4″ seams, quilting tools, half square triangles and more. If you’re a beginning or intermediate quilter and you’re interested in improving your skills, I encourage you to check them out. Today Sandi taks about the importance of quilting in her life and offers some advice on learning foundational skills for piecing traditional blocks.
(OK, those photos aren’t really me. Images are in the public domain via The Library of Congress.)
Wednesday, June 8, 2011

Filomena!!! Los Liiiiiiinks!

As for that title, I got it from the video above. I don't use Bing but the commercial is funny. Actually in my head I call the Lauren's Links portion of the newsletter "Los Liiiiiinks!!!" in that guy's voice. It's funny, I assure you.

Anyway...on to the link.

This is a really good article (CLICK HERE) If you have ever sat there looking at your finished quilt underwhelmed (I know I have) then this is a really good article to read. Dena Crain is a teacher in Kenya and quilter, and her blog has this article on it about things to consider when you're not thrilled with your quilt. It talks about everything from color choice, to thread tension on your machine. I found it very helpful!

Tuesday, May 17, 2011

"Important safety tip. Thanks, Egon."

Yes, I will always find an excuse to squeeze in a Ghostbusters quote. But let's be honest here...who wouldn't?

Anyway, I'm still trapped in my own personal binding quilts hell (::whine::) so I haven't been up to much other than that. Even the chicken quilt is on hold! Well, for the moment. So while I'm busy not being at all productive, I thought I'd do a blog about tips...safety and otherwise...that I use on the daily (when I'm quilting) or that I haven't tried yet but people at the shop keep telling me (I promise I'll try them out eventually!). If I know/remember who I heard it from, I'll attribute it to them (no last names for privacy's sake!)...if not...well, thanks for the tip whoever you are!
  • I know we're all really careful not to hysterically wave our rotary cutters around and to not use them to hack at fabric as though they were a broadsword, but accidents can and do happen.  A good way to lower your odds of filleting yourself is to keep your fingers away from the edge of the ruler when you're cutting, and to ensure that happens, place your pinky on the outside edge of the ruler. This helps prevent the ruler from sliding and guarantees your fingers are away from the cutting edge. Suggested by Koleen. Nothing is ever 100% foolproof (not even those stupid gloves), so you may still get cut if something bizarre happens. Always be careful!
  • Here's another tip for quilting injuries...we get stabbed by pins and needles, occasionally sliced ourselves with a rotary cutter or scissors or run our fingers over in the sewing machine (bad news) - sometimes we get blood on our work...eek! This sounds gross but I swear it works (unless you have gotten a significant amount of blood on your work, this is more for pinpricks and papercuts): Dab a little bit of your saliva on your (non injured) finger and put it on the bloodspot on your fabric. It may take a couple tries, but it will remove most if not all of the blood. This is great in a pinch if you aren't at a place where you can stop and wash your fabric or your quilt. Also, did you know there is a reason why little kids (and some of us big kids) stick our cut fingers in our mouths? It looks and sounds icky, but our saliva is a natural coagulant - if you have a minor cut or pinprick, saliva will stop the bleeding. Suggested by Helen. Just promise me you won't go spitting on other people's cuts...it only works on your own blood, and really, that's just nasty.
  • If you don't have a no-slide cutting ruler or if your grips are worn down and you're not ready to buy another, in the mean time try placing Press n' Seal wrap on the back of your ruler. It is translucent, so you can see through it reasonably well and it has enough tack to it to keep your ruler from sliding on your fabric. I tried it - it leaves no residue on either your fabric or ruler. Suggested by some lady in the Tips portion of The Love of Quilting with Fons and Porter.
  • Patterns can be a real pain in the butt to wrangle with by your machine sometimes, and storage can be an issue with all of those many pattern and their little plastic baggies they usually come in. To cut down on the storage issue, I numbered and wrote the pattern name on the bottom of the page on each page of the pattern. Then I shoved those pages in the clear binder sleeves and stuck them in a binder. Any applique pieces and patterns I slip between the pages in the sleeve, or keep the little baggie and slide it in with the pages. As for those little baggies the pattern came in, if they're salvageable, I use them with other projects to keep my cut pieces in so nothing gets lost. Otherwise, when you need the pattern just take the page you need out of the binder and there you have it, all nice and contained by your machine. This is my own method, and so far it's worked pretty well!
  • Ripping out stitches just plain sucks. If you promise to be super careful, you can quickly and effectively rip out those stitches with your rotary cutter. Open the seam enough to get the blade in there,a nd using small strokes, let the blade snip the thread. You need very little pressure for this! Once your thread is all chopped to bits, use an emery board and run it gently from the inside of the old seam to the edge of the fabric. This will remove those little threads! Mom taught me this one :) We won't be held accountable for any injuries stemming from this tip! The key is to go slow and be very, VERY careful.
  • If you're not comfortable using a rotary cutter to take out a seam, using your seam ripper you can do the same thing, run the sharp part of the ripper down the seam. Or, as Loretta suggested, cut every 4th stitch - it'll come right apart without having to snip every single stitch.
  • Here's something I learned after doing it the hard way - If you're using a circle cutting ruler (you know, the ones that have all the sizes of half circles cut into it?), use a small rotary cutter to cut your fabric through the ruler with, something like a 28mm or an 18mm. A standard 45mm is too wide and can damage your ruler or knick your blade.
That's it for now...Keep an eye to the Newsletter for more great tips!

Tuesday, May 10, 2011

Late Night Sewing Adventures

If you know me, then you know that I am a night owl to the umpteenth degree. I stay up late and wake up waaaay too early, though not 100% by choice. So what do I do? No, I'm not out drinkin' with the college kiddies. I'm not watching Powerball (okay, so I'm probably watching WWE)  or heck, I'm not even reading. I'm out in the middle of the living room sewing, and sometimes I get a wild hair and try something new.

This is the case with the other night (I can't remember which other night, one of 'em recently...is it bad that at 23 I'm losing track? I need a vacation, lol). I have never really delved into the wild and wooly world of templates. Based solely upon the reception of template usage in Block of the Month - oh yes, there was groaning - I kind of just assumed they were a pain in the keester and I more or less avoided them. But *someone* delivered a subtle hint to me that they wanted me to try them, by putting a freakin cute pattern in my cubby box at work...Mom...

So I gave it a go, and you know? It wasn't hard at all. I don't know what all the griping was about! It took a few extra minutes to draw trace out the templates onto some template plastic, but I had those and all the fabrics cut in less than 45 minutes. The only issue I encountered with the pattern was that it was a wedge type design that converges in the center rather than going across in rows; that in and of itself wasn't the issue, the issue was just the bias on those edges stretching because someone got irritated at sewing it together wrong and tore out the stitches too vigorously, thus stretching the bias and making the center bubbly. Ahem.

 I used fabric from Jinny Beyer's Outback line (the two black pieces) and the rest is from M&S Textiles' Australian Aboriginal fabrics. I think I have Audrey Martin Napanangka and Bea "Nambooka" Edwards featured here.

I love it and it looks great, but uh, I screwed up the middle. That's suppused to look like a peppermint candy, you know, every other one? I got irrtated and pulled out my stitching and put it back together and in the process stretched the bias and made it bubble in the center. Luckily the fabulous Carol can fix that little issue in quilting! But anyway, not bad for a first go!

Why yes, I DO know better. But that, my friends, doesn't mean diddly.

So yeah. My machine hates me. Which, by "my machine hates me," I actually mean I totally screwed it up myself. User error.

I know better than to sew over pins, which is why I always take them out before my needle goes over them. who am I kidding? I don't. I leave them there...like most imperfect quilters (is there such a thing as a perfect quilter? Ooh, quilting existentialism). But in the back of my brain I know that there is a risk of breaking a needle or the pin if the the needle actually hitis the pin. apparently it's way back there in the back.

To the untrained eye, it looks like I'm being a diligent machine owner and cleaning my machine after using it. Yeah, that beast gets duuuuusty. I wish I could say that this is why I have got everything dismantled. Alas, I ran over a pin and the unexpected happened....

See that? Yeah, the pin didn't break like one would expect it to, and nor did the needle....The damn thing sucked itself into the feed dogs and got itself crimped and stuck therein. You should have heard the noise. It was ugly. I think my roomate dang near jumped out of her skin, because there she was minding her own business, watching Futurama, and KA-CHING-CRUNCH - pin, meet feed dogs, they want to devour you.

So what is the moral of this story? You probably shouldn't run over your pins. Will I run over my pins again/still? You betcha. But I will change my needle and watch things a little more closely.

Somewhere out in the wild and weird world of the interwebs, there's a Quilt Police Officer taking down my number so they can smack me upside the head with a ruler. 


Monday, February 28, 2011

Pushing my envelope...well, kind of...

Yeah, I'm getting baaaad about posting. Gotta remember! But I did have a validish excuse...well, for a day...My brother Mychal turned the big 2-1! I'm just his sister but it feels like he should still be, I don't know, 10? He'll always be my little baby brother...I can hear him groaning at that from across cyberspace (zip it, Myke! :D)...even if he is almost a flippin' foot taller than me!

Anyhoo.

I finally tried hand quilting..I wanted to give it a whirl because it is SO outside my skill set. I'm a free motion quilting kind of girl. Fusible applique and I are BFFs. But you know, being a glutton for punishment I decided to try something outside my comfort zome (machines). I shouldn't say that...I DO like embroidery and cross stitch...so handwork isn't entirely outside of my comfort zone, but when it comes to quilting, it is.

And...I liked it. But I had the best teacher for this method. She's been teaching quilting for years and hand quilting/hand applique is her game. Seriously, her work is IMPECCABLE. So it was a real joy to learn from her!


This is where I started. Stitches looking a liiiiittle wonky. The longer, wonkier beige stitches are just a basting stitch.

FINALLY getting the hang of it!


Hey, it's starting to look like something! It'll have feathers around it. I think this is going to end up a pillow for my grandma :) She loves hearts, and though in this picture set you can't tell too well, the background is yellow - her favorite color.

I can't wait to see what our next pattern will be!

Monday, January 31, 2011

Dang you, offset triangles! Dang you all to heck! Hee hee.

If you know me, then you know (probably all too well) that when it comes to quilting and Blocks of the Month, I'm one of those pain in the arse-y people who is simply incapable of following the pattern. No, no, no. I always have to change SOMETHING...usually color, so it's no biggie, but kind of when you have to try and match your color choices to what the pattern calls for. So, before I show you what I (tried to do) did, I''ll show you what I SHOULD have done:
This is Kaye England's English Pathway's 6 Month Block of the Month program. I'm not a floral kind of girl, but even I have to admit, this quilt is gorgeous and a computer picture simply doesn't do it justice - the turquoise in there? Fuhgeddaboutit. It's WONDERFUL. But like I said....I don't care for florals. So...


I did it THAT way. The center of the star is the line I pulled everything else from. I should know what that line is called...Crap...Well, we have it at the store, it's the super contemporary piece. Crud. Ah well, I credit my laspe in memory to it being 1 in the fetchin' morning and that I'm watching stand up comedy (LOVE). Bah. Anyway...that border of triangles in the quilt...from the first picture? Yeah. Those are the freaking DEVIL. They're offset, which in theory isn't difficult but toss that bias edge in there with someone who irons fabric until it's super dead...what a pain in the... So I'm still stuck on that part. And by "stuck" I mean, "I'm tired of freaking looking at those dang triangles."  But eventually this thing is going to go on my bed and I'll re-do my bedroom to kind of match it. Aw heck, who am I kidding? Yeah I will be re-painting the walls and doing a wall hanging to match. Seeing that in writing just reaffirms what a Type A I am sometimes. Yeesh. lol.

So, yeah. Not too shabby.

For YEARS I've heard how just pants-crappingly boring hand work is. Granted, I kept hearing that out of someone who simply detests doing hand work...I think there might be a correllation there! Haha. Well, I remembered back in the day (the day being like, 1993, lol) Mom making a Yo-Yo snowman quilt for her friend Anabel, and not really finishing it because, "Holy crap, yo-yo's!" So I never even considered giving it a go even BEFORE I started quilting...so I did recently-ish.

So I started this beast in July 2010. And by "beast," I mean "teeny table mat." It was my first time working in wool felt or doing hand applique, and all things considered, I think I did all right. It came in a kit, that oh how conveniently, had all the stuff down to the dang needle and floss in there...so no excuses to not finish it!


There's the one little nook in the flower petals were I was sitting there going "Well, sh!t. What the fetch am I supposed to do here?!" So, I decided to cram 2 stitches right in there. Yikes. MISTAKE. But of course, I couldn't be buggered to take the stitches out because I realized it looked ridiculous 2 petals after that. Yeah....Not undoing the last 10 stitches. Bah. :-)

That's the kit it originally came out of, above. We do have them at the shop if anyone is interested :-) But we have tons more, you know, spring, winter style ones as well.

As a complete aside, unrelated to anything, I'm sitting here watching Chelsea Lately, and a Jack LaLanne Power Juicer commercial came on...creeps me right the heck out that the guy died like a week ago and they're still playing the commericals with him in them. Creepy.

Anyway, I digress.  So yeah, disregard my [bada$$] leopard sheets...I do my best stitching (and blogging) on my bed. If I'm not working, I reserve the right to be obscenely lazy, lol. But in the picture you see what the teeny mat is supposed to look like. Pumpkins. Cute! What's that you ask? Have I finished it yet, it now being January 2011? ...*cricket noises*


So having commented that I actually enjoyed hand applique-ing...Much more than doing machine blanket stitch (I'll leave that to Carol!) ...Mom decided that she'd "give" me one of her wool projects she started in 199....*cough* and have me finish it. For being a primitive style quilt, it is really cute. I like the colors she chose! But she's always been absolutely fantastic at that (I'm serious!). But here that is. So far I've only done the bird and the flowers, but I'll get to the rest...sometime....eventually...lol.


I think there are 2 more rows to it. I haven't looked in a while, lol. No idea what to use as a border, if any at all. But so far, it's coming along nicely! I can't recall for the life of me what pattern it is, so before anyone asks...lol.