It's hard to believe that 2011 is, for all intents and purposes, over. Every year people all over express this sentiment, and I am no different - this year just flew by. Seriously, it's like I blinked my eyes a year ago Sunday, and poof! The year is gone before it even registered in my brain.
Fine, that's not entirely true. I am more than happy to see 2011 in my rear view, fading quietly into the past. For those that know me and mine, 2011 was a turbulent year to say the least. Money was tight, health faultered and stress was at an all time high. Every year has its ups and downs, and every crest and every valley must be taken in stride - it just seems like that rollercoaster was more extreme than other years. Looking back, I see how close things were to getting very serious and it is sombering, yet at the same time there is a lot of joy to be found in knowing that there is so much to be thankful for; things could have very easily fallen off that razor's edge and taken a turn for the worst, but they didn't.
New Year's brings about one of two reactions from people - on one hand, in rushes a flood of enthusiastic resolutions, and on the other, a chorus of vehement rejections about making resolutions for the New Year on the grounds that it's pointless. I have to say that I'm on the fence there. Half of me says if the turn of the year is what lights a spark and becomes a motivating factor in goal setting, then so be it. But then the other half of me knows that the majority of resolutions won't be kept, so why make them to start with?
I suppose, in this case, the optimist in me wins out, and like millions of others, I make a resolution or two with good intentions. The pattern is familiar; most commonly, with fervor and seemingly untarnishable conviction, people swear to exercise more, eat less, work harder and save more money. There is absolutely nothing wrong with those pursuits, all of them respectable. Last year I swore up and down that I'd work out and get myself really fit, and back down to a single digit dress size. Here it is, the end of December, and I'm staring down a number I'd rather ignore. I guess what I'm getting at is, for me anyway, those kinds of resolutions are unattainable because in my own life they lack resonance and meaning. It's almost like they're lip service, a promise to keep for a few months and then break by means of apathy.
So this year I have a different set of Resolutions that mean more to me than the number on a tag.
- I am going to try and slow my life down. Life is hellaciously busy and I have workaholic tendencies. I've learned this year that I don't take enough time to take care of myself the way I should, to be with the people I care about and to just enjoy the day to day. It's time to make a conscious effort to relax.
- I want to get more projects done, to include my UFOs sitting in the bin in my sewing room. I want to try new and more difficult tenchniques, and finish them too. Really, my sights are set on expanding my skill set and really working towards being a better technical quilter.
- I want to go back to school for an art degree, to be put towards design. I have a plan, a master plan, and this is a piece of it.
What are your resolutions?
Oh, and happy anniversary to my parents, 27 years!

Friday, December 30, 2011
Sunday, December 25, 2011
I'm just popping up here to say Merry Christmas to everyone. I know we all celebrate different things, but today is not a PC Happy Holidays day....so Merry Christmas and I hope everyone has a wonderful, warm and joy filled day with the people they love.
For those that don't celebrate Christmas, I hope your holiday season has been, is and will be just as joyous and wonderful.
Have a great day!
For those that don't celebrate Christmas, I hope your holiday season has been, is and will be just as joyous and wonderful.
Have a great day!
Thursday, December 22, 2011
Lovely Frankenstein's 24 Days of Christmas: Scrappy Stocking Christmas Ornament

Photo Courtesy of Stumbles & Stitches
Here is another quick, simple and adorable ornament pattern that takes no time at all to make and finishes up nicely. CLICK HERE for the tutorial and thank you to Angel & Jenny for sharing!
Wednesday, December 21, 2011
Lovely Frankenstein's 24 Days of Christmas: Star Ornament
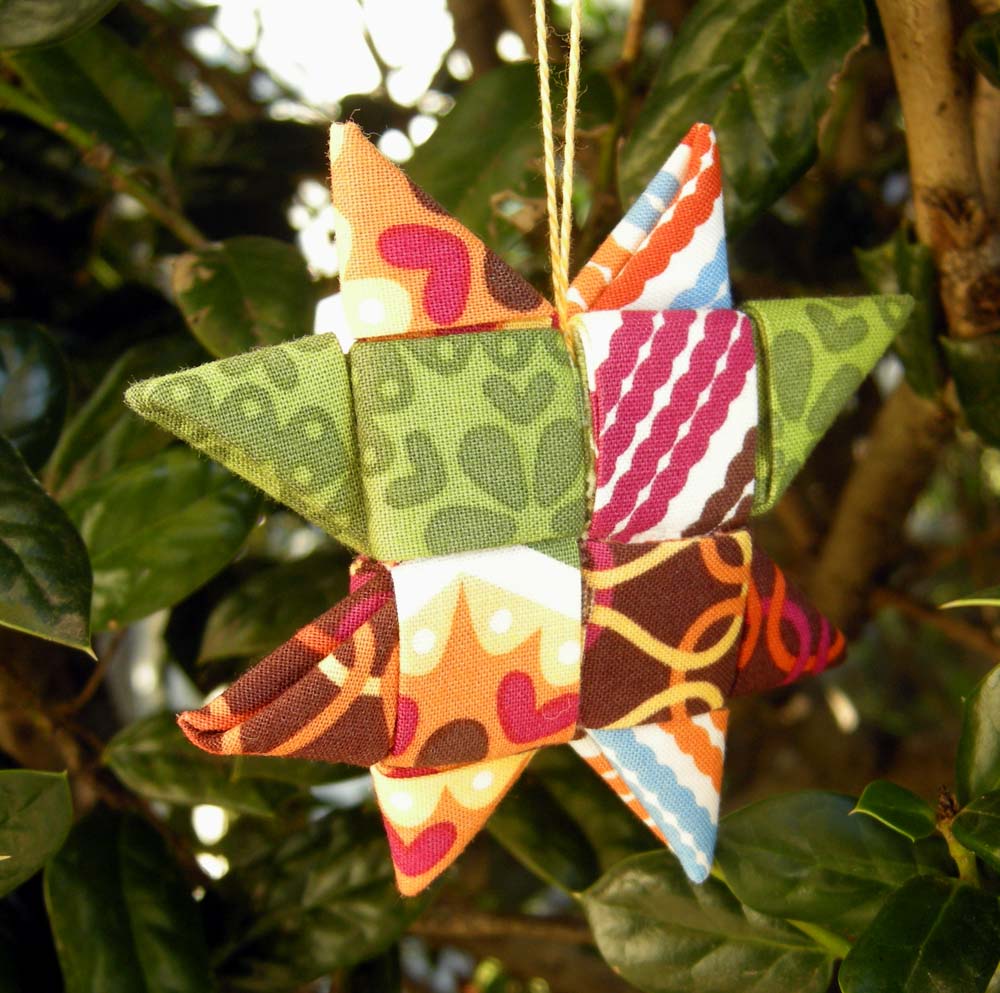
Photo Courtesy of Betz White
Ohmuhgawd. Christmas is only 4 days away. 4. How the heck did it sneak up so quickly? This week is all about quick, afternoon-and-less projects. This darling little star would make a perfect addition to anyone's Christmas tree, and not only that, it would make a cute detail on a package. Did I mention it's a no-sew? CLICK HERE for the tutorial, and thank you to Betz for sharing!
Tuesday, December 20, 2011
Lovely Frankenstein's 24 Days of Christmas: Custom Digital Camera Case
.jpg)
Photo Courtesy of Sophia's World
This is pretty cool! Make a custom camera case for your friends and the best part is, is that it fits most newer digital cameras. The pattern could easily be adjusted for the older digital cameras that aren't as compact. It also takes very little in the way of fabric, so you can use what you have on hand and it's done in a flash. CLICK HERE for the tutorial and thank you to Sofia for sharing!
Lovelyfrankenstein's 24 Days of Christmas: Shopping Cart Caddy

Photo Courtesy of Blue Cricket Design
This. Is. Brilliant. Major high fives to Becca for thinking this one up! My roomate and I fancy ourselves moderately apt couponers (as opposed to, you know, the EXTREME variety). But I have to admit, even couponing n00bs such as ourselves, it's hard to keep our coups in order when we're in the store getting sweet deals. So This is a brilliant, brilliant idea. We all know couponers, so this is fantastic as a gift for them. but this is oh-so-clever for other purposes too - keep your shopping lists in there, recipes you're shopping for, coupons you pick up from the fixtures in the aisles, a calculator if you're on a strict budget (hey, it happens...I have found myself whipping out the ol' cell phone calculator more than once); or if you are/know someone who is a mom of a child that still ride in the shopping cart, it's great to keep little toys or books for the little one to enjoy (and to keep them patient and well bahaved) while you're doing your shopping! I'm thinking I'll be making a few of these. How cute would it be to make/buy a neat reusable grocery bag, and pop one of these in there? Gift idea problem SOLVED! CLICK HERE to get the pattern and a big thank you to Becca for sharing this!
Sunday, December 18, 2011
Lovely Frankenstein's 24 Days of Christmas: Eyeglasses Case

Photo Courtesy of Mommy's Nap Time
Here's an oldie but a goodie - the eyeglasses case. Let's be fair here, most of us have contacts, glasses or at the very least, readers - and just about everyone has a pair of sunglasses. This is a cute and simple gift for just abut everyone out there and would make a nice Secret Santa gift or stocking stuffer. I know when I had non prescription shades, I just threw them in my bag and sometimes the lenses would be fine and sometimes they scratched - these are a cute way to solve that issue! Don't worry, Mom, I don't do that anymore with my prescription shades! CLICK HERE to get to the tutorial, and thank you to "Emedoodle" for sharing!
Saturday, December 17, 2011
Lovely Frankenstein's 24 Days of Christmas: Pear Sachet

Photo Courtesy of Dacia Ray
This is a variation of the lavender scented sachet that is relatively commonplace. Considering you don't HAVE to fill it with lavender (choose whichever herb or potpourri that suits you or the person you're making it for), these little guys make sweet gifts, especially for the people we all have to buy gifts for but don't know well enough to know exactly what to do for them. As I've been looking across the internet for gift ideas, generally I've just seen square or heart shapes, and generally they're flat. This one is neat because the pear shape is very different than a lot of the others, and it's more three dimensional. CLICK HERE for the tutorial, and thank you to Dacia for sharing!
Friday, December 16, 2011
Product Review: Cutting Edge Rulers
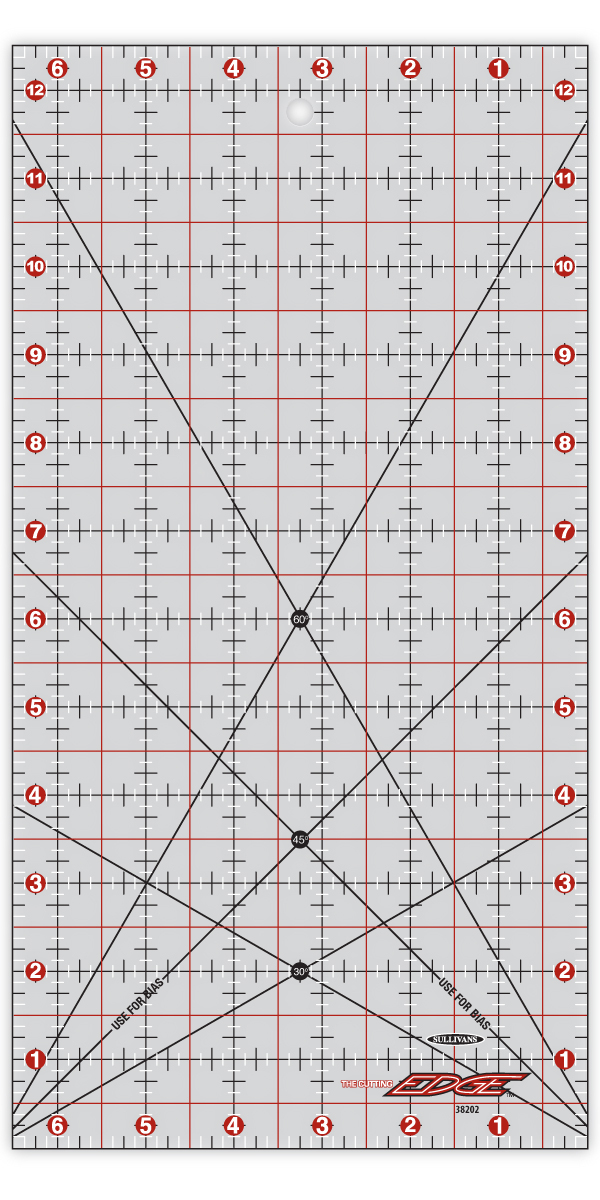
The Cutting Edge Ruler by Sullivan's
This time around I'm reviewing Sullivan's Cutting Edge Ruler. The concept behind this ruler is that on one edge, there is a metal, blade sharpening strip; as you cut your blade is sharpened, hence extending the time between blade changes.
We're testing these out at the shop and I have one at home. I have been a Creative Grids girl since I started quilting. I LOVE those rulers but these give those a run for the money. Here are the pros and cons:
Pros
- This ruler stays PUT because of the frosted back. I mean, it does not move at all.
- Comes in all the different common ruler sizes
- Reasonably priced
- Actually sharpens your blade if used properly
Cons
- The sharpening noise is atrocious. I HATE metal-on-metal sounds (it's my version of nails on a chalkboard) so I rarely use the sharpening edge for that reason alone.
- There are no measurements on the lines on the inside, so finding the measurement you need takes a little more focus to make sure you're cutting accurately.
- The frosted back, while preventing slipping, is difficult to see through, which makes ensuring your fabric is straight and lined up difficult if the color is off.
Despite the cons, I use this ruler all the time at home and love it. I don't know if we'll be carrying this at the shop any time soon, but I recommend giving it a shot!
Lovely Frankenstein's 24 Days of Christmas: Scrappy Mug Rug with Pocket

Photo Courtesy of SEW We Quilt!
I think it would be pretty cool if someone made one of these, popped a packet of coffee, tea or hot chocolate in the pocket, found a cute little spoon to put in there, rolled it all up and stuck it in a neat mug. Bam - awesome gift, especially for office parties or Secret Santa exchanges where you don't know the person particularly well. Or maybe you do know them well and you know they drink a lot of coffee/tea/hot chocolate! Either way :-) CLICK HERE for the tutorial and thank you to Jennifer for sharing!
Thursday, December 15, 2011
Lovely Frankenstein's 24 Days of Christmas: Coffee Cup Cozy
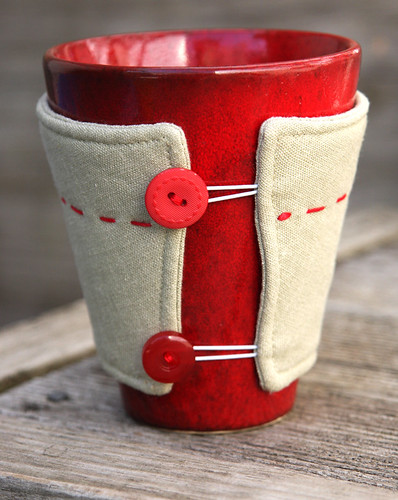
Photo Courtesy of Hazelnuts
Here's another really quick gift idea with all of the Secret Santa parties cropping up. This is really simple to make and can be made to fit any size cup, even ones with handles. I think the best part about this one is not only the ease of the project, but the fact that it is nice homemade touch to a purchased gift, and with the elastics used to keep it all closed up, it can stretch to fit different mug sizes. Cool! CLICK HERE to get to the tutorial. Thank you to the archaeologist at Hazelnuts for sharing!
Wednesday, December 14, 2011
Lovely Frankenstein's 24 Days of Christmas: Quilt-As-You-Go Tablerunner

Photo Courtesy of V & Co.
Tablerunners always make great gifts, but sometimes when time is as limited as it is now, getting one pieced AND quilted AND bound can be a little, well, rushed and we're all saying, "...forGET that...how's about a gift card?" (which, by the way, gift cards to The Cotton Patch make awesome gifts! Hey, I'm not one to forego a chance at a shamless plug). Well, this is a darling quilt as you go table runner, so you're hitting 2 birds with one stone here, and all you need are strips - no blocks, no squares, no appliques - just strips. You could easily make this a season specific project or something to be used any time, and it goes together in an hour or two...probably the hardest pqart is just picking the colors! CLICK HERE for the tutorial, and thank you to Amy of Diary of a Quilter for sharing!
Tuesday, December 13, 2011
Lovely Frankenstein's 24 Days of Christmas: Sewing Machine Cover

Photo Courtesy of Sew Mama Sew
The idea of making someone a fitted, custom sewing machine cover is great and all, but how conspicious is it to go to a friend's house and take measurements on their machine? I can see it now: your friend walks out of the room for a minute, and while they're gone, you bust out the measuring tape and start taking the dimensions of the machine. They walk back in and you have that awkward moment when you're at their machine, tape measurer still in hand and all you can do is answer the "what the heck are you doing" question with, "...nothing...just....quality assurance..." Yeah, busted! So avoid that awkward moment take the winter gloves approach: one size fits most! This simple machine cover will fit most domestic machines, and adjustments can be made for longer machines (if you know what the machine is). I know you're getting so sick of me saying this, but uh, guess what? ...you can use scraps and stash for this one too. CLICK HERE for the pattern and tutorial. Thanks to Jessie at Tiny House for sharing this at Sew Mama Sew!
Monday, December 12, 2011
Lovely Frankenstein's 24 Days of Christmas: Checkbook/Checkbook Register Cover

Photo Courtesy of Attempting Creative
All right, all right, not too many of us carry around checkbooks, especially those of my generation. But even without checks, hopefully most of use keep our check registers with us while we shop and Debit our lives away. This is just so much cuter than the basic register holders that the bank gives you. This is just another little way to stick it to "The Man" and carry your checks/check register in something cute that doesn't have the Bank's name all over it. It's another great scrap and stash buster and it's a quick and easy gift for someone (even yourself! :D). CLICK HERE for the tutorial and pattern. Thank you to Kimberly for sharing!
Sunday, December 11, 2011
Lovely Frankenstein's 24 Days of Christmas: Tie-On Slippers

Photo Courtesy of Tissue Papers
These are so flippin' cute! I have a pair of shoes that look like these and I love them, so what's not to love about these in slipper form? These are such a fabulous break away from the usual slipper style. They're easy to make, and so very versatile with fabric choice. I love I'd love a pair of these babies with some fluffy Minkee inside! This one is a little tricky in how to get to what (there are a few websites involved), but I think I've got it as simple as possible: CLICK HERE for the how-to, and CLICK HERE for the templates. Thank you to Lisa Ancarrow-Maltby for sharing your pattern with us!
Saturday, December 10, 2011
Lovely Frankenstein's 24 Days of Christmas: Double Pot Holder

Photo Courtesy of A Little Gray
Some things in life are so good and so SIMPLE that they make you smack yourself on the forehead and say "Dang it! Why didn't I think of that?!" This is one of those things. It's a double potholder. It makes so much more sense than fumbling with two, and it's perfect for those awful "microwave safe" bowls that manage to get hotter than the surface of the sun. Plus, you can reuse one of those towels that's gotten ratty and you're about to throw away anyhow. CLICK HERE for the tutorial, and thanks to Jessica for sharing!
Friday, December 9, 2011
Lovely Frankenstein's 24 Days of Christmas: Sewing Machine Organizer and Catchall
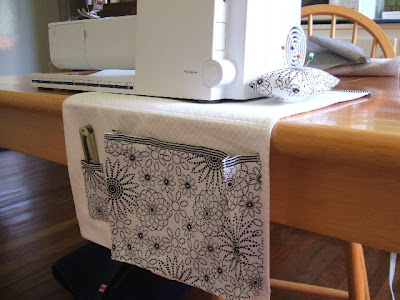
Photo Courtesy of Mellebug
While this makes a great gift...I can honestly say I'd make one for myself just because of how sleek it is. I find most sewing machine organizers a little bulky and in my way, but this one is pretty slick. I love that it has a space for the pattern you're working on in there, to keep it ready for when youneed it, but out of the way. It's just another gift that's perfect for the quilter who has it all! Besides, most folks don't think to make this kind of thing for themselves, so why not do it for them? CLICK HERE for the pattern and tutorial (very well done, by the way!). Thanks to "Mellebug" for sharing!
Thursday, December 8, 2011
Lovely Frankenstein's 24 Days of Christmas: Pincushion Threadcatcher

Photo Courtesy of K Quilts Studio
Here is a neat gift idea for the quilter who has it all. Fine, so everyone has their own way of doing things at home, but how great would this be to take to classes? Your pins are right there and you don't have to worrry about making a mess around your sewing machine while you're in the classroom (hey, some people do worry about those things), because there's a little bin attached for your threads, pieces of fusible, snipped dog ears, or whatever you're needing to throw away. The process of making one of these little guys is actually pretty easy and once again, it doesn't require a lot of fabric you can probably use what you've all ready got! Bonus there, huh? CLICK HERE to the the pattern and tutorial - there is amore printer-friendly version available on her page. Thanks to Karen for sharing!
Wednesday, December 7, 2011
Misadventures in Quilting, and Why We Should Admit It
You know, sometimes I forget that people read what I say on here. One should always assume that anything one says online is being read by both familiar and unfamiliar people across the wild, weird Internet. That's a pretty important thing to shove to the back of the brain! Well, I'll be totally honest. I do forget about that point, quite a lot actually. This blog is a lot of fun for me because I am so impassioned by quilting and I truly want to share it with everyone. Just like anyone else with a quilting blog, it's quilting as seen through my eyes in my own voice. As a side point, for those that don't know me, I pretty much write the way I speak, which I'm sure explains for you my tendency to ramble on here...like I'm doing...(I do it in real life too).
But in forgetting that people actually read this, it comes back to me in some funny, strange and touching ways. I was utterly stoked when Craft Gossip mentioned this blog in their supermassive, super awesome blog...actually, come to think, I still can't believe it! They are out of Australia. Someone from allllll the way in Australia read my blog. Holy mackeral! Then I look at my blog stats, just for fun. Someone in Russia reads the heck out of this thing, and someone from allllll the way over in Kenya has been reading too. It makes a girl feel pretty small that someone so far away in this huge world and this immense-yet-tiny Internet is paying attention at least every now and then. Very humbling, and very cool.
Every now and then, a customer will be in the shop and mention that they read my blog, and I know that every single time someone tells me that, I invariably look like a deer in the headlights. It goes something like this: Customer: "Oh, I read your blog!" Me:
"...huh?"
The other day I was at work at the register helping a customer (since this is the Internet, I won't be mentioning names, but she will know who she is!), you know, like we do. I was cutting fabric and we were chatting and after we were done with the register dance she told me, basically, that she reads my blog and loves it. Despite my chronic Deer-in-the-Headlights Syndrome, I managed to squeak out what had to be the most awkward "thank you" ever and told her I was glad she enjoyed it...and I am!
But she went on to tell me she really gets a kick out of it and it makes her laugh because I will admit to things that it seems a lot of other people and quilters don't - making mistakes, getting mad about them, the cutting corners in the do-as-I-say-not-as-I-do method, etc - and it was nice to hear someone else talk about doing the same thing we know every quilter does. What went from my typical awkward exchange of "wow, people read this...thanks!" went to another level of deer-in-the-headlights...all I knew to say was "Thanks I'm glad you get a kick out of it!" I know, I know, I'm a painfully awkward human being when it comes to recieving what I percieve to be a compliment. Nothing new there!
That customer brought up a really good point and it got me to thinking though. I didn't realize until she pointed it out that I DO jabber on about how I made some mistake here or there, or how my color choice didnt work like I thought it would. But I do. In real life, it's true - I do get super PO'ed when I make a mistake, especially one I could have avoided had I not been arrogant enough to not read the directions thoroughly, and it's true, I HATE admitting when I'm wrong. But I feel like here, in a community of quilters doing the same thing I do, I can admit to making silly mistakes and be genuine about it; after the fact, it is pretty funny and it does make me laugh and since I seem to write this blog obliviously, I just say it and don't think twice.
But again, little things can get you to thinking about bigger picture ideas. I watch shows like Fons and Porter and Quilting Arts. I meet quilters of all skill levels every day. Sometimes, if it's a very rare day, I'll meet a household name quilter (and be absolutely starstruck). But I notice the same thing she does - as a community, very seldom do we admit to making mistakes and having things not work out like we planned, and when we do it's in a negative context. Watching quilting shows, mistakes made are either never addressed, or are brushed aside as things only inexperienced quilters do and certainly not the hostess. But then when a mistake is made on-screen it too is brushed aside as being difficult to do on TV, not as an error any skill level quilter can make. What?
I'm going to keep right on admitting that I screw up minorly and majorly on projects all the time. I miscut, iron instead of press, forget to pin, get fusible on my iron, step on pins, lose pattern pieces, lose appliques and redo them only to find the one I lost after sewing to replacement down, sew things in upside down or backwards, accidentally have one piece with wrong side up, sometimes have a wonky quarter inch, break needles, sew over pins, pucker fabric and God knows what else. Sometimes I fix it because it has to be fixed and sometimes because I want it fixed - but then again, sometimes I say, "Forget it, I'll fudge it and make it work," or "Whatever, it'll press/piece/quilt out." And you know? My quilts turn out pretty nicely if I do say so myself. They're not perfect by any means, but then again, show me a quilt that truly is, and I'll eat my hat. And that one messes things up while quilting doesn't mean it's simply inexperience, lack of skill or just "being dumb" (I hear that one a lot...quit saying that! You're anything but dumb), it means that you're using your human brain and human motor skills and, well, those functions are just not 100% accurate 100% of the time when you're doing something as involved as quilting.
By admitting, no matter how experienced or inexperienced we are, that we make mistakes while we're making our quilts (and laughing about it instead of being disparaging about it) is just one more thread that brings this community together. I'm not saying go out and point out your every mistake, that's not it at all. But being honest about having difficulty with something in the process when it comes up can serve as a confidence boost for everyone involved. It levels the playing field for quilters at all skill levels, because if a beginner knows that an advanced quilter sometimes miscuts a square, loses a pattern or miscalculates a measurement, it reminds them that no quilter is perfect and they can be that good too regardless of their mistakes in the process; it's the "well, if they had trouble with that part too, then maybe I'm not as silly as I thought I was" thought process that helps give us confidence. It helps people become more accessable to one another, to open the discussion up to asking for help, tips and suggestions, rather than perpetuating the "I can't do this!" mindset. So our misadventures keep us humble and keep us together in the community no matter how good at this we are. Elitism between skill levels is one of the negative aspects of the quilting community, and by laughing at and talking about the mistakes we know we all make, makes that elitism a non-issue.
So let me hop off my soapbox and get back to work on figuring out what I'm going to substitue for that Layer Cake piece I screwed up.
So let me hop off my soapbox and get back to work on figuring out what I'm going to substitue for that Layer Cake piece I screwed up.
Lovely Frankenstein's 24 Days of Christmas: iPad Case

Photo Courtesy of Fresh Lemons Quilts
Isabelle, this one is for you...well, and all the other lucky duck iPad owners out there. Make your very own iPad case out of your favorite fabric. You can stabilize it just about as much or as little as you'd like. What I like about this pattern, is that it closes completely - so many iPad and Kindle patterns are open on one end to slide the thing in there, and I know I'm a klutz and a nervous Nellie so I'd want this sucker to close right up. Hooray for zippers! This pattern could easily be modified to suit non-Apple pads as well as the various brands of E-Readers. CLICK HERE to get to the tutorial and thank you to Faith for sharing!
Tuesday, December 6, 2011
Lovely Frankenstein's 24 Days of Christmas: Scrappy Tote

Photo Courtesy of, well, Don't Call Me Betsy
If you know me you know I'm a big fan of bags and totes. I have no idea why, but I've beent hat way since I was a little kid. Anyway, this tote is a good size and very customizable for whoever you're making it for. It can be as classic as what is pictured, or as wild as you want to make it. Plus, it's another great opportunity to use leftover precuts and scraps for the decorative part of the bag. I could see my aunt loving one of these! CLICK HERE for the tutorial. Thank you to Elizabeth for sharing this!
Monday, December 5, 2011
Lovely Frankenstein's 24 Days of Christmas: Fabric Gift Boxes

Photo Courtesy of Geta's Quilting Studio
This is from one of my favorite blogs, Geta's Quilting Studio. It's done by a gal in Romania and I just love her projects! She has a great way to use up your leftover pieces of stabilizer (even the heavy duty stuff) and scraps to make these sweet fabric boxes. They're perfect for gift-giving, or just to spruce up your sewing area or home while being practical at the same time. CLICK HERE to get to the tutorial. Thank you to Geta for sharing this!
Sunday, December 4, 2011
Lovely Frankenstein's 24 Days of Christmas: Scrappy Stocking

Photo Courtesy of Stellar Mother
Scarps are the name of the game when it comes to this cute little stocking, so it's guilt free! Use up your stash and make a cute and useful gift for yourself, family or friends in no time. Too bad my roommate already bought a stocking, otherwise I'd have made her one. CLICK HERE to get to the tutorial. Thank you to the lady who writes for Stellar mother! I'd post a name, but there isn't one available. So just check out her blog and enjoy!
Saturday, December 3, 2011
Why Scraps?
If you haven't all ready, you're going to notice a lot of posts centering around projects that are either, A) scrap/stash focused, or B) easily done using scraps/stash. I work in quilt shop. Why am I posting such things?
Allow me to explain.
It's the end of the year, near the holidays. Money is always tight, but now with the rapid approach of the holidays, it's even moreso. Money for fabric has gone to money for gifts, food, airfare, decorations, gas, entertainment and what have you that is by and large absent ove rthe rest of the year. Not to mention, time is of the essence and what is quicker and easier than using something you all ready have? The key with these projects is use what you have as you can, and supplement with bought fabric as you need to. It's good for everyone, and the person who is recieving the gift will never be the wiser as to whethe ryou just bought the fabric or you had it in your stash; they'll be too busy being absolutely THRILLED that you thought to make something special just for them.
So use your stash, use your scraps and supplement as you need to with quilt shop fabric. Your local quilt shop will be happy to help you find something perfect to match with what you have all ready!
Lovely Frankenstein's 24 Days of Christmas: 10 Minute Table Runner

This table runner, designed by LaRae Bunnell Clark is a snap to ake and a perfect way to showcase any large scale print you have, Christmas or otherwise. Plus, you have an "excuse" (not that you need one) to use some really fabulous buttons to make that fabric pop even more. I found this through Marge over at Delaware Quilts, but CLICK HERE to go straight to the free PDF. Just a note: though this pattern has so kindly been provided for free by Ms. Bunnell Clark, if you intend to make this for any other reason than for yourself or as a gift for someone - for example, to sell at a market or to teach as a class - I would suggest contacting her for permission to use her pattern first.
Friday, December 2, 2011
Lovely Frankenstein's 24 Days of Christmas: Folded Star Ornaments

Photo Courtesy of All Things Crafty
Here is another great (and elegant) way to use up your smaller scraps, and there is very little sewing involved. These would make beautiful gifts, and they're perfect if you want to give something nice but you're strapped for cash. Lovely! CLICK HERE for the tutorial...thank you to Trish at All Things Crafty!
Thursday, December 1, 2011
Lovely Frankenstein's 24 Days of Christmas: Softie Trees!

Photo Courtesy of TeresaDownUnder
What a cute idea! Use your scraps to make these darling little trees. It's easier than I thought it would be, it seems the trick is stabilizer and not stuffing! Thought, you could use stuffing too if you wanted I suppose. CLICK HERE to get the tutorial...thank you Teresa for sharing!
Wednesday, November 30, 2011
Lovely Frankenstein's 24 Days of Christmas

Okay, I promise not to give any Scrooges a fat lip (tempting though it is) but I WILL post a new Christmas project daily from tomorrow until Christmas Eve. There will be lots of quick and easy DIY gift ideas, Christmas decor and the occasional recipe in there too. So stay tuned for this Halloween nut to show you how holly jolly she can be!
Sunday, November 27, 2011
I've been a busy (and not so bloggy) girl
Thanksgiving is done and the busy Black Friday/Small Business Saturday shopping is slowing down. Me? Oh you know, just finishing projects and binding :)

Thursday, November 24, 2011
Happy Thanksgiving
If you know me in real life, then you know I'm not a very sappy, sentimental person. I don't like talking about my feeeeelings and emotions in general, and I don't think I ever will. But hey, once in a blue moon, right?
Here it is, Thanksgiving. It seems cheap to me to profess our blessings and how thankful we are one day of the year because the holiday demands it, when we should be thankful every day for the people we share our lives with and for all the things we do have. For me it feels even cheaper when I think about the time this year that I've felt just completely stressed out, scared and hopeless. Yet I find myself feeling all gooshy and sentimental anyway.
2011 hasn't been the best of years for me and mine, but even so it's impossible to ignore all of the truly happy and wonderful things this year has brought. All things change - for better and for worse, through the choices we consciously or subconsciously make, or without our influence whatsoever. It's not always easy to ride that wave, but it is important to stop at the crests and gulleys and recognize that things could always be worse and to focus on the positives and not the negatives. Sometimes it's easier said than done, but it's always worth the effort, to focus on the good things in our lives and within ourselves.
So what am I thankful for?
My family - you stay with me when it feels like everyone else is walking away, and who keep me in check with reality. You boost my ego and keep me humble at the same time, and always keep me laughing.
My best friends, Lauren and Isabelle. You're the only 2 people (not related to me) who get my weirdo sense of humor, and that have the same affliction. You keep me sane, and kick me in the butt when I'm working too much (I need that too).
My Readers. You keep this blog fun, because I would have stopped months ago if I saw no one was reading it.
The fact that in this economy, I have 2 jobs. Not only that, but I have 2 really wonderful bosses that I seriously wouldn't trade (though, at the shop with Mom that goes without saying) and my co-workers are fantastic too.
Our customers. You keep me inspired and on my toes, and visiting with you is sincerely a good time.
My part in the shop and the quilting community. So many people can't say they are truly doing what they love and I feel blessed to even have a minor part to play in doing what I love.
Personal growth. I am thankful to have learned how to use stress as a learning tool instead of letting it defeat me, even though I have much more to learn in that regard. I'm thankful to have grown more and become stronger as a person, and to have just that little bit more confidence in who I am, flaws and all.
I guess I'm just thankful to be here at all and to still be standing, and to know the people I love so much are still standing too. Regardless of successes, failures, health or disease and between Health Care deprivation, student loans, bailouts, scandals, conspiracies and Occupy protests ...we're all going to manage just fine.
Happy Thanksgiving.
Friday, November 18, 2011
Product Review: Sewline Quick Thru Needle Threader
Sewline is a company that specializes in sewing and quilting notions, with their most well known product being the mechanical Sewline Fabric Pencil. They are growing more and more popular as a company, as people look for new gadgets to make their quilting process easier. Their pencils are indeed absolutely fabulous, but that's a review for another day. This time around I'll be reviewing their Quick Thru Needle Threader.

This guy.
What a fabulous idea! it looks like a lipstick case, but when you pull the top down, there's a needle threader! And, if you pull the bottom lid off, there's a little case to hold spare needles. What a cute little package, huh? That being said, Sewline, I'm taking you to the woodshed. While this is a great idea for a product, it would be so much nicer if it actually functioned properly. This thing is not well constructed at all. The threading piece is extremely fragile and it was my experience, as well as that of several of our shop's customers, that it broke after less than 10 uses. Now I was gentle with it, and I know my customers (this group of ladies have been handstitching for decades, I know they know how to use a needle threader properly) were too, yet this thing broke.
Thinking we might have recieved a bad shipment of threaders, we called the company to let them know that, "Hey, just so you know all of your threaders broke for us and our customers, so we have reason to believe that we recieved a shipment of defective threaders. What are you going to do about it for us?" Get ready for this: They told us that they knew they were defective when they sent them out, but we're in luck because they're selling replacement cartridges for us to buy to sell to our customers at $5. Basically, in order for the $10ish threader to work like it should have when it was purchased, our customers were expected by the company to buy a $5 replacement cartridge AND the company knew about it. Pretty sneaky on Sewline's part and that's a $15 threader now! Needless to say, we didn't charge for the replacement cartridge because that's pretty bogus.
As an idea, this product is great. If our experience with the threaders involved them being functional right out of the package, I'd give this product 4 stars, easy. But that was not the case, and so the Sewline Quick Thru Needle Threader gets:
Thursday, November 17, 2011
Thursday, It's Technical: Optimizing your Sewing Room
This is a confessional. I, Lauren, have an out of control sewing room. Seriously. It's ridiculous. Seven months ago, I had a functional sewing room with a sewing table and shelves and a closet and it was all reasonable organized. Well. My best friend moved in in April and she's lucky I like her because there went my sewing room, and entire room got relegated to oh, a 6'x12' "breakfast nook." But I got the little place organized and optimized, and until my fabric shelves broke and spilled everything everywhere, I ran a tight ship there.
So if you're thinking of organizing (or re-organizing as the case may be) your sewing room, first of all, consider the following questions:
- How large is your proposed sewing room?
- Will it be used for more than just sewing (scrapbooking, jewelry making, etc.)
- What is the lighting like in there?
- Will my typical organization methods work in this space?
Those questions will help guide you in how to best use what you have and what kind of supplementary items you may need or want. If your sewing room is large, you probably have room for different work stations - a cutting area, a sewing area, a pressing area, and then areas for other crafts like scrapbooking and the like (if that's your game). But if you're like me and have a teeny-tiny, eeensy-weensy sewing room, your objective will be how to most efficiently use the space you have for all of your sewing and/or crafting supplies.
If your lighting is mainly coming from one source (an overhead light, for example) then consider adding task lighting for your projects. If it comes from multiple sources, like an overhead light and a large window, be careful of where you place your fabric so it doesn't get sun bleached.
Consider how you organize in the rest of your home. Are you by nature neat and organized - do you label and categorize? Or, are you (like me) a whirlwind with a haphazard and case-by-case methodology? Set up your sewing room to play to your strengths. If you have a tendency to stack things out where you can see them, then shelves are a good thing to consider. If you like things put away, then a chest of drawers might be your best bet.
Once you figure out the larger furniture and placement oriented aspects of getting everything squared away, here are some ideas get things neat and accessible:
- Use wall space to your advantage. Wall mounted shelving, hooks, pegboards, bulletin boards, design walls and wall mounted magazine racks are all great ways to keep things organized and out in the open, yet taking up zero valuable floor space.
- If you are lucky enough to have a closet in your sewing room, take advantage of that space by housing larger or less-used items away in there, either on the shelves under the bar or hanging on hangers. The closet is a great place for batting, large ironing boards, sewing machines you seldom use...using pants hangers (the kind with the squeeze clips) you could clip up and away less-used rulers and templates as well as large pattern pieces that just will not fold back up, or pieces of material (like pleather, vinyl, laminate, wool) that are difficult to fold or shouldn't be folded.
- Rolling carts or small, portable kitchen islands are great for housing your projects and/or supplies and they are easily rolled out of the way when you aren't using them.
- Cabinets are perfect for closed storage, but think about how you use them. Once the shelves inside are filled, use the inside of the doors too! If the space between the door and shelves is wide enough, put some nails in and hang small items. If it's not, use it to hang fabric swatches with the selvedge on from your latest project (in case you run out of fabric, you'll know what to get) or put up pictures of your favorite color ways to inspire you. It's your very own Piniterest in your home!
- Wall mounted thread racks are Godsends. See your thread right away without having ro rummage through a bin.
- Store away your scraps in shoeboxes. The cardboard breathes better than plastic, so you don't run that remote risk of mildew (if you're worried about that), plus they're something you probably already have around. Organize as you see fit - by scrap size, color, print style, whatever - and stow away.
- Foam core or comic book inserts are great folding aids. Wrap your fabric around those and you'll have your own mini bolt of fabric for whatever size cut. It keeps more fabric more compact than just folding and you can set it on end, fitting more fabric on your shelf/in your bin than folding and stacking.
- Labelling the yardage amount on your cut pieces and scraps (if it's not readily apparent) is a lot of work but if you work out of your stash more often than not, it's a good way to know which fabrics will work for your project and which won't.
- Hang dowel rods on the wall or inside a cabinet to keep your ribbons and spooled items out of the way and untangled
- Small plastic baggies are great for housing buttons and other embellishments because they stay contained, and most of those baggies have a hole in the top above the closure so they can be hung on a pegboard for easy identification and access.
- Put patterns in binder sleeves in a binder. One large binder takes up less space than the same amount "ziplocked" bags the patterns come in with the pattern inside. Plus, using dividers or sticky tabs, you can quickly find the pattern you need without rifling through a large box of patterns.
- Hardware stores carry wall mountable storage drawers, used there to house screws, nails and all that small stuff. Use one in your sewing room, wall mounted or not, to house your sewing machine needles, buttons, embroidery floss, bobbins etc. Each drawer can be labelled too!
- Portable toolboxes are great to house small notions of a similar type out of the way yet easily reachable. They're great for buttons, clothing closues (like hook-and-eyes, zippers, snaps), beads and other embellishments, sewing machine parts, etc.
- Use the ArtBin project bins to keep current projects, class projects, Block of the Month programs and UFOs organized
- Mint tins and the like are great for storing broken needles and bent pins safely contained.
- Magnetic bulletin boards with the magnetic tins are perfect for storing buttons, pins, needles, in a more visually pleasing way.
- Use a dry erase board to write up your project list, items you need to buy at the quilt shop the next time you're there, cutting instructions, or other notes to yourself as you work.
There are a million and one different ways to organize your sewing room, and it takes trial and error to figure out what works best for you. I hope this has given you some food for thought and helped you with adding to the great ideas you all ready have!
Sources and Other Links
All People Quilt
TipNut
Tuesday, November 15, 2011
Product Review: Heat n' Bond Feather Weight

If you do fusible applique, then at the very least you have heard of the brand Heat n' Bond, if not used it yourself. There are a few good fusibles out there on the market, and I have found through trial and error that Heat n' Bond products work the best for me. Not that the others, like Steam-A-Seam or MistyFuse, don't work well; they do, but I like the results I get with Heat n' Bond better.
Anyway, so Heat n' Bond has developed and released their response to MistyFuse and the other very light fusibles, which is their Feather Weight brand. We got it in at the shop for Carol and I, since we do a lot of applique, to test and see what we thought. Our opinions differ. I like Feather Weight, and actually I prefer it to Heat n' Bond Lite (my previous staple). I concede, however, that Feather Weight has some...idiosyncrasies. But once you know how to deal with and counteract those quirks, it's a wonderful, wonderful thing to have on hand.
Feather Weight really is just that...it is light as a feather! I have a tendency to go for patterns and designs that pile layer upon layer, and so the thinner the fusible, the better. But like I said, there are some idiosyncrasies. When the fusible comes off the roll, Heat n' Bond has affixed the plastic instruction sheet to the inside (fusible) side of the roll. The adhesive is so thin that trying to pull that instruction sheet off without tearing a wide swath from the middle is both an exercise in patience and dexterity. I have found it difficult not to lose an inch or two from the end that I peel the sheet off of, but I have also found that once you get it started and it stops tearing, it can be ripped right off like usual. Also, if you pull the sheet off just a few inches past where you're planning to cut your piece off, the fusible won't tear when you go for another piece and have to tear the instructions off again.
Speaking of instructions, this is the one fusible where I do in fact follow them. You absolutely cannot use a higher iron setting on this stuff, because the fusible is so thin it'll just dissolve away if you do. It on;y takes a second or two to adhere it to your fabric, but once it's on there, it's fabulous. Because of its thinness, it's able to be repositioned on your applique. The drawback on that thinness though is that repeated ironing, when you assemble your applique, makes the fusible dissovle a little more each time so you may find your corners coming up as you stitch everything down if you're working on a more intricate project.
So with Heat n' Bond Featherweight, its assets are also its liabilities. I have found, however, that it is more beneficial than not and it's definitely a product worth giving a try.
I give Heat n' Bond Feather Weight...

Wednesday, November 9, 2011
Two Finished Projects in Two Days. Bam!
Whelp, I have spent the last two nights sewing my booty off and here's what I came up with:

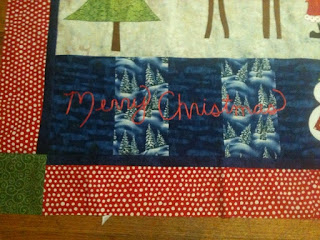


Woo! It's done! The one complaint I have about Piece O'Cake's pattern is that there really wasn't a helpful placement guide and so just in eyeballing how far away to put the reindeer and Santa from the seam I ended up placing them too low when I gauged how far down to put the large tree. There ended up being a huge white space and it looked weird I thought, so I just filled in with more trees. I like the end result there! and the green squares in the corners aren't part of the pattern either, I just thought it would be an easy way to bring the green out without it being overpowering.
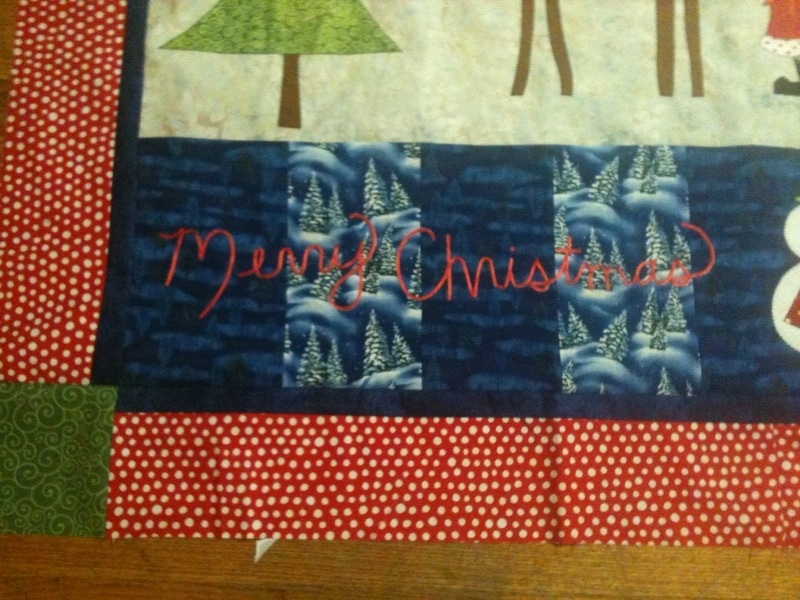
It also called for thin ric-rac for the lettering, but gave no placement guide for the letters, so I just used Hot Fix ribbon and my own sloppy cursive. It's whimsical, dammit! :D

Here is another one from BJ Designs, another of my favorites. It's just a quick and cute 20" by 20" mat.

Here's the whole kit 'n caboodle. It's hard to see here, but the "white" is actually a light gold with gold metallic snowflakes on it. It's not as bright and glaring in person as it is in the photo. Thanks, fluorescent lighting!

Here's a closer shot. See? The "white" is actually gold. Not quite as intense. But the snowflake is Michael Miller's Fairy Frost with the the glitter. Oooh....sparkly.
Let's see. Next up I have another mat like the snowflake (but it's a candy cane instead) and yet another from BJ Designs that's a large wonky Christmas tree. I'll get a picture posted of that soon, once I get it all together :-)
Tuesday, November 8, 2011
Bad Blogger...Bad!
Well, since we got back from Quilt Market, I know I haven't been the most diligent blogger around. Truth be told, I've been busy as all get out! I've been getting projects done (like you saw in the last 2 posts) and I've been working on the new ideas for the shop that we learned at Quilt Market. Plus, for the month of November we're short staffed at the shop so Mom and I are pulling double and triple duty to make sure things go smoothly. That being said, get better soon Debi! We need you :-)
So in the mean time, I'm running out of informational topics to write for you about. If you want to see something quilting related discussed on this blog, leave a comment and I'll make it happen! Untill then...I'll have a slew of neat new tips for you tomorrow.
So in the mean time, I'm running out of informational topics to write for you about. If you want to see something quilting related discussed on this blog, leave a comment and I'll make it happen! Untill then...I'll have a slew of neat new tips for you tomorrow.
Sunday, November 6, 2011
It's not even Thanksgiving yet!
I know. I know. Those of you that know me know how I feel about Christmas invading my life before I'm good and ready - which invariably is the day AFTER Thanksgiving. Buuuuuut I work in a quilt shop and now October was the time for beginning our Christmas samples. So after getting a simple little poinsettia tablerunner done...this is ny next one. It's from the Piece o' Cake book


Friday, November 4, 2011
Cabin in the Stars is done!
Finally... It's done! I'm very happy with how it turned out. Its amazing how A fabric can look great in a smaller swatch and overwhelming as a whole - the second picture is my original border...the white in the flowers ended up being too much. Oh well. Never know until you try! First picture is the finished product with the border I ended up with. 

Thursday, November 3, 2011
International Quilt Market 2011: Part 1
If indeed heaven exists, I'm pretty sure it would resemble a Quilt Market. No, seriously. It is immense and wall-to-wall fabric, notions, quilts, kits, books, patterns, gizmos, gadgets, gifts, and everything else under the quilting sun. But I'm getting ahead of myself here....so how was the trip?
Well, it's no secret that I'm a land lover. I absolutely and categorically HATE flying. Hate hate hate hate HATE. I figure, if I were meant to fly somewhere along the lines I would have evolved with wings or at the very least an unnattractive flap of skin with which to glide from tall buiding to tall building in a single bound. Last time I checked, I missed that evolutionary train and here I am, a biped with no flying parts. Or, going a different route, I'm pretty sure God would have created me with wings, or a gliding flap or hell, given me the ability to defy gravity and fly around. Unless my mirror is lying to me, neither scenario is true...I definitely cannot fly by any means so why on earth would I want to get into a heavy metal tube with affixed wings and play Russian Roulette with gravity and air speed velocity? Buuuuut, unfortunately, to go anywhere outside of our surrounding states, to fly is the most logical and economical transportation choice, and that's precisely what we did and for four hours one way and four hours back I hated every single second of it. I decided mid flight that while it has to be the most awesome job on this planet (and eventually several others), I would make the worst possible astronaut ever! Anyway, flight one was okay as far as flights go, except for the guy sitting next to me who decided it would be a blasty-blast to chat my face off the entire flight. Flight two sucked really, really, really bad. Talk about flying metal death traps! I'm all ready white-knuckled in the best of flying circumstances, but toss in some violent turbulence and I'm a crying, panicky little wuss....and that's exactly how that went. Yes, I, cried on a plane as an adult. Because hey, we got tossed around like an empty can in a wind tunnel. Fun times.
But we landed THANK GOD and then it was off to our first adventure in Houston, Texas. Let me preface this by saying despite my uptightness while flying, otherwise I'm pretty easy going when it comes to travel. I don't really care where we stop and I'm always up for a little city exploration but ho-ly crap. So we get to our hotel and it is definitely in the gangland. We stayed at the Marriot, which was actually really nice considering its location, and it wasn't until the following day that we noticed it was surrounded by barbed wire and its closest neighbor was a strip bar called "Sinfully." Keeping it classy, Marriot! Anyway, we ventured out for some dinner, which if you go to our store you know we were all about the Waffle House. We don't have those in Oregon, and we LOVE their hashbrowns. If you're not familiar, the Waffle House is the greasiest of greasy spoon chains, open 24 hours and the scene of many a late night hubub...Kid Rock got into a fight there once. Don't go for the waffles (ever), but go for the hashbrowns, because oh my God, yum. So we knew one was (according to Mapquest) 0.6 miles away from our hotel but damned if we could get there! Apparently, for one, Houstonians drive like stampeding wildebeest on PCP and for another, nothing is logically laid out or clearly marked. So we ended up in a frontage street going the opposite way in an area with gang graffiti and barred windows at night, in the dark in a rental car. Bonus. After a half an hour and a useless cell phone GPS later, we wind up at the Waffle House for some glorious hashbrowns (covered is the way to go, always) and I remember that oh crud, I forgot my toothbrush in Oregon. Blast! So mom says hey, we need to get one since they didn't have any in the quickie mart in the Marriot and hey, she needs some hairspray too. So we head out trying to find a grocery store or market or anything that would have toothbrushes and hairspray in the same building. Five miles later? No grocery store at all, no quickie mart that isn't poorly lit with bars on the windows with people loitering and gang graffiti. Finally after circling back we giveup and go to a Chevron to get our stuff. By now I'm tried and cranky and so is mom so we buy or stuff and get the heck out and to the hotel. When we get back, we learn after looking in the binder with all the local ammenities that if we would have just called down to the concierge we could have gotten a toothbrush, hairspray and tons of other stuff for free in the comfort of our pajamas. Life lessons.
So Friday was our first day at Market and we had to go into downtown Houston to the convention center for the Schoolhouse Series classes. A few observations...yes, Houstonians still drive like maniacs, there are still no dang grocery stores along the freeway into Houston aaaaand the streets were EMPTY. Even in downtown no one was out walking around! It was so strange. In Portland, pedestrians are all over and the parks are full and it's clear that people live there. Houston? Either a hurricane just blew through and people were still evacuated or maybe it's just not a pedestrian friendly place because there was no one out on the streets. There was a beautiful park across from the convention center and no one was there. Mom commented that it had to have been the economy hitting the city harder than Portland (which, it hit pretty hard in places too), which is probably true unfortunately. It really is a beautiful city, but the absence of people was just eerie. It was almost post-apocalyptic, no joke. I digress.
The Schoolhouse Series was worth the cost of the plane ticket alone. Each class lasted 30 minutes, with 5 minutes in between. during each half-hour segment, up to 20 different classes were held relating to bettering your business, learning new techniques, seeing new lines, reviewing new books, seeing how to use new notions better, color theory for quilters and Q & A sessions with designers. We met up with a family friend, Michelle, who owns Sooner Quilts in Guthrie, Oklahoma. I grew up with her kids, and my folks have been frtiends with Michelle and her husband for years, ever since we were in the Marines. Anyway, we decided to divide and conquer - I'd take classes I thought were good and they would take classes they thought were good. After all was said and done, we learned a LOT. Mom and Michelle took classes from Joanna Figueroa, Jinny Beyer, Jo Morton, Bigfork Bay...I'm not sure who else honestly, you'll have to ask one of them. I took classes from Kaffe Fassett, Brandon Mably, Tula Pink, Amy Butler, Anna Maria Horner, Valori Wells (an Oregon native), Jinny Beyer, Karen Brown, Stephanie Prescott (A Quilter's Dream) and other non-designers.
Here's an anecdote for you: I got kicked by Kaffe Fassett. Yes. Kicked. Kicked by Kaffe. Kaffe the Kicker. No, no, no, it wasn't intentional so before there is any righteous indignation brewing heres how it went...I was sitting in the classroom, where the aisles were narrow. Kaffe was apparently in a hurry and came barrelling down the aisle before I could move my knees to give him more room to walk through the aisle. He got me right in the shin, hard enough that I was thinking "Ow! Hey!" but no bruise, no nothing. Though I don't think he noticed, because he never acknowledged the kick. Ah well, makes for a good story!
Anyway, you're probably (maybe) wondering if we actually for-real MET any of these people. I did! You'll have to ask mom about the people she met, because honestly I can't remember. But I met Tula Pink, Brandon Mably, Kaffe Fassett and Stephanie Prescott. By met, I mean talked to for more than a "Hi, thanks for being here, love your work." Tula Pink reminded me of my roomate - sharp witted, funny and slightly sarcastic. I liked her, there didn't seem to be any hoity-toity fakeness about her which was really nice. Brandon Mably was really a nice guy, very obviously art based, but he didn't have that highbrow way about him either. We had a really nice conversation about composition and I was very impressed by him, especially since he went out of his way to talk to people. Kaffe, all kicking aside, I was less impressed by. He wasn't rude by any means but I found him very aloof and he was definitely very higbrow, and I found him bordering on arrogance. But I guess when you're as influential as he is... Stephanie Prescott is the designer behind A Quilter's Dream and I seriously cannot speak highly enough of her. She is incredibly nice and what I was so impressed with was that unlike a lot of other designers and store owners, she was very open and willing to share ideas with people and share the things that brought her so much success. She repeatedly said that while she doesn't want everyone to be a cookie-cutter of her, she really wants to help other businesses and designers succeed especially in this economic environment and if that means telling people the things that worked for her, so be it! THAT is how the quilting world ought to be.
On another note, Mom, Michelle and I had to eat lunch there at the convention center and it's amazing how brazenly these places flaunt that they know they have you by the short n' curlies. A cafeteria burger was $13, and honestly a Big Mac for less than half that is far better quality. During the Market, one slice of high school cafeteria quality pizza cost $5 and all drinks that you can get from a vending machine for $1.25 cost $3. Man oh man I forgot how they do that! Mom and I kept saying "we should have gone to Waffle House for this." lol.
So Saturday was the Market day, and hooooly mackeral I was not ready for what I saw. It. Was. HUGE. Take Portland Expo and multiply that 3 or 4 or 5 times. Immense. Like I said before, if heaven exists, I'm pretty sure it looks like Market. It was all wholesale stuff, so everything that could be bought was for stores only, not for customers...Market for customers didn't start until Nov.1. But anyway, shop owners had the option to make appointments and buy fabric with the different fabric companies, as well as see new pattern, book and notion designers along with all of the old stand bys. Designers had booths and quilting show hosts had booths and magazines had booths. It was nuts! Mom and I started walking together and checking things out until her meeting at 11:30 and then I went off on my own all googly eyed and in awe of the whole thing. I have to say, on a more personal note, it just reinforced that much more that I want to do quilting world careers and not academia geared ones. It was so COOL. So lets see...who all did we see there that we didn't see at Schoolhouse...Nancy Zieman, Elinore Peace Bailey, Marianne & Mary Fons, Patrick Lose, Jan Patek, Barbara Jones, Pepper Cory...good grief I'm sure there are plenty of others. We got lots of patterns, a a few books signed just for us. I got one signed by Kaffe Fassett...I mean it's the least he could do, right? ;-) Oh, I'm kidding. But no, I really did get one signed by him. Mom got a couple signed and I can't remember who by...one of her favorites but her name is long and hard to remember through the fog lol. Ask her! We got a lot of great tips and ideas for new programs and new ways of doing things, so be on the lookout for that. Plus, we are going to have a FABULOUS Block of the Month starting in January....but my lips are sealed! You'll have to wait and see.
Well, after Market we pretty much crashed. We got home around 7 or 8 inthe evening, and we had to be up and out of the hotel by 4am (yes, a.m...Think I'm cave trollish now? Get me up at 3:30 in the morning and you'll see a cave troll all right...knuckles dragging, grunting and lumbering, the whole 9 yards) to the creepy Hertz place. We had a super obnoxious guy on our plane, who was shouting down the concourse at people and I'm pretty sure he was still drunk from the night before. When we got off the plane, he looked at this little girl and told her she was sucking out all the air and making people suffocate. Not his kid, but some little girl behind us just excited to get off the plane at Denver. What a weird guy. But we got to Portland by quarter to 9am and let me tell ya, I slept most of the rest of the day.
Pictures are all ready up on our Facebook page, but I'll post some here soon!
Tuesday, November 1, 2011
Are you on Facebook?
Are you on Facebook? Are you friends with The Cotton Patch? Well, our profile got locked and due to the nature of the security questions to get back in, we are unable to access it to update. When you're friends with so many people from all over, people that you may or may not know personally, how is one supposed to identify that person in any random picture on that person's profile? Unrealistic? Yes. Needless to say, we won't be getting back in to our account.
So. Out with the old, and in with the new! If you're on Facebook, CLICK HERE to "Like" our page on Facebook, or search "The Cotton Patch" and find the page that way. Look for updates on new fabrics, classes, and general quilting world news.
So. Out with the old, and in with the new! If you're on Facebook, CLICK HERE to "Like" our page on Facebook, or search "The Cotton Patch" and find the page that way. Look for updates on new fabrics, classes, and general quilting world news.
Saturday, October 29, 2011
Houston Quilt Market Update
Well, I met Tula Pink and Anna Maria Horner, and Kaffe Fassett kicked my shin. Lol. No, seriously! He was walking through my aisle and I couldn't pull my legs in any further and he got me. Yay for strange stories!
Otherwise, we did the Schoolhouse Series yesterday and we're doing the exhibits and shopping today. Woohoo!
Otherwise, we did the Schoolhouse Series yesterday and we're doing the exhibits and shopping today. Woohoo!
Thursday, October 27, 2011
International Quilt Market 2011 - Houston or Bust!
Well my dear readers, I'm going to be signing off here for a few days because I'm going out of state and away from my little netbook. International Quilt Market here we come! Yes, I'll be in Houston for the Internation Quilt Market 2011 with Mom, taking classes, looking at fabric and ninja-ing my way through Sample Spree.
I'll be back on here by Tuesday! Until then, do try and behave a little on Halloween...eat, drink and be scary...and have a designated driver!
I'll be back on here by Tuesday! Until then, do try and behave a little on Halloween...eat, drink and be scary...and have a designated driver!
Wednesday, October 26, 2011
Top 5 Favorite Pattern Designers (in no particular order)
1. BJ Designs
BJ Designs is my all time favorite pattern company. She meshes realism with whimsy, and it's predominantly applique which is my favorite quilting method. Her animals are so neat - I've done the Kangaroo, Bear and the Elephant. There are more than just animals, she offers holiday and miscellaneous patterns too. The neat thing about BJ is that she is interested to see your version of her pattern. A customer of ours had commented to her that someone at our shop had done 2 of her quilts as samples and she was very interested in seeing how it went! I sent her the photos and got a response back from her too, which I thought was really nice!
2. Bigfork Bay
Bigfork Bay walks the line between whimiscal and realistic, and I love them both. Their pieced quilts are fantastic, but I much prefer thier realistic animal patterns. Big surprise, huh? The realistic ones are a challenge, but the outcome is SO worth it. So far I've conquered the lion and the wolf, but I'd love to work on the puffins and the tiger too. They have lots of horse patterns as well, and lots of deer too. They give their animals such neat names too, that you hardly feel inclinded to name your own quilt. Check out the rest of their patterns here. Plus, they also sell kits to their patterns so if you like what you see, you can make it as close as possible!
3. MountainPeek Creations
MountainPeek is one of my go-to pattern companies for when I want something to make that focuses more on showcasing incredible fabrics and that goes reasonably quickly. They are fantastic! Though many of the patterns are pretty simple, they are very impactful based on what gets used to make them. They do Fat Quarter and Pre-Cut focused patterns too, so they really cater to all. I love their Shadowbox pattern, and it is perfect for those last little bits of focus prints you have laying around. I'd link to everything, but the way their website is set up, t's not condusive to linking. So click the MountainPeek link above and have a look!
4. Quilt Woman
Out Blank Rep turned me on to this pattern company and boy do they have it all - quilt patterns, bag patterns, clothing patterns, even beginner specific patterns! Plus they also go a lot for the AccuQuilt system, so if you have one of those bad boys, Quilt Woman has patterns designed specially for that piece of wonderful equipment. Here there really is something for every quilter and stitcher alike. One of my very Favorite patterns is "Flying for Nitwits" which is, you guessed it, a Halloween quilt!
5. Briarwood Cottage
The Booville quilt made me a believer! Once I saw (and made, pictures will be up soon) that quilt, I started looking into the rest of their stuff and it is great! They have Block of the Month quilts as well as wallhangings and the like, but I really am partial to their Block of the Month style stuff. The sizes are manageable and they are really versatile for all styles of fabric.
Tuesday, October 25, 2011
Pumpkin Patch and Yard Decor

First we set off to find pumpkins and we found this awesome place in Gervais called Another Pumpkin Patch (left; go to their Facebook HERE) and they are absolutely the best! They donate 100% to Famers Ending Hunger and Marion Polk Food Share.

We walked away with 10 small gourds, 1 large gourd, 4 white pumpkins, 4 large orange pumpkins, a red pumpkin and 2 grey pumpkins for $35. This is only a little over half of what we got. A big THANK YOU to Molly at Another Pumpkin Patch for doing what she does!

As you saw above, the weather was kind of, well, Oregon-esque. Cool, grey and damp. But a few hours later it cleared up and I have to say, few things out in the world are prettier than a bright, crisp blue fall sky and the bright orange, red and green leaves.

So my roomate had bought some hologrpahic ornaments to put in the tree. They're little gravestones...cool idea!

Some decorating had been done all ready, like these spiderwebs and giant spiders...I learned later that our across the street neightbor is terrified of spiders. Whoops. Well, I guess you can't win 'em all.

Skeleton brides and grooms, gravestones...I'm contemplating putting some fabric/balloon ghosts out there. I think we have something like 10 gravestones total out there.

The white pumpkins we thought would look nicer painted than carved. So I got bored the other night whatching re-runs and decided to paint a damask bat on one. The damask didn't work out as well as I hoped so I opted for lacy instead. I'm pretty happy with the results!

Another shot of the white pumpkin. I thought a painted stem and spiderwebs would look neat. My roomate suggested using it as a centerpiece on our snack table. I do have a pumpkin stand, so I think she's right!
Well, that's it for now. I'll post more pictures after we get back from Houston. Everyone's costumes are coming right along and the inside of the house is looking nice and spooky. Our neighbors and passers by were giving my roomate and I weird looks because we were out in the driveway destorying a set of old curtains...we burned holes in them, ripped them, dragged them through the dirt and gravel, and sprayed with with fake blood. Our house is going to be a haunted house! Woo! Boy, I love Halloween time :-)
Subscribe to:
Posts (Atom)